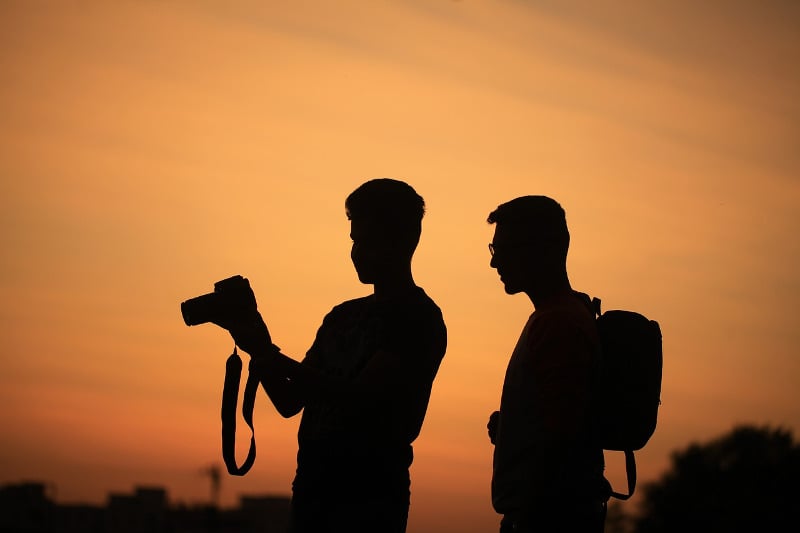
Do you wonder what settings you should use for travel photography? In the past have you taken a lot of images that have come out blurry, too dark, or too bright?
In this post I will tell you the settings I often use when I am out and about exploring. Using these settings provide me with content for my blog, my Instagram, my social media profile, photographs that I often license through agencies, and also images that I sell for prints.
I’m keeping it simple and writing the settings I would use for both day and night travel photography, as well as a few tricks for adding a bit of wow to your images.
If you are very new to photography, I recommend reading my Photography Basics posts first.
Day Photography
When travelling often we don’t have much time to be messing around with settings. Therefore we want to be seeing, doing and exploring as much as possible, rather than spending hours getting that perfect shot. Below you will find the settings I would use for my travel photography during the day.
Settings:
For day photography I almost always shoot with the below settings. I use an SLR (Canon 6D) for most of my photography, although an advanced compact would be OK too.
- Camera mode: Using my current Canon 6D and before this my Canon 60D I have always got well-exposed images in Aperture Priority. In this mode you set the aperture /depth of field, and then the camera will set the fastest shutter speed it can.
- Aperture: Often when I take photographs I will be shooting at around F/8, which generally gives me a good depth of field (sharp elements throughout the image). If you want to take photographs where the background is blurred, but the foreground is in focus, try using the widest aperture you can (such as F4) and then getting close to the subject (or zooming in). This may not have a huge effect for cameras with smaller sensors (small compacts, phones), but on cameras with large sensors (SLRs) you may see a difference.
- Shutter speed: This will be set by the camera in aperture priority.
- ISO: It’s generally best to always keep your ISO as low as possible (such as 100), but a good trick is to set your ISO to auto when you are moving around a lot, as well as a minimum shutter speed of whatever you need to get your image in focus without handshake. Minimum shutter speed is often 1/focal length, ie if your focal length is 60, then on a full-frame camera you need at least 1/60 for a sharp image. For small sensors, you would need faster shutter speeds ie over 1/60. On my camera I often set a minimum shutter speed of 1/125 when I am out on the streets and not using a tripod. This is because I often zoom to my longest focal length (105mm), so I want to guarantee I get sharp images.If you find you are still getting blurry images, then try increasing your ISO manually to force the shutter speed to go faster.
- Drive mode: If you are taking action shots, you may want to use burst mode, otherwise, just stick to the default one shot.
- Focus type: I almost always have autofocus when taking day images, unless I need the focus to be at a certain point, such as a foreground element or a background element, and the camera isn’t picking it up.
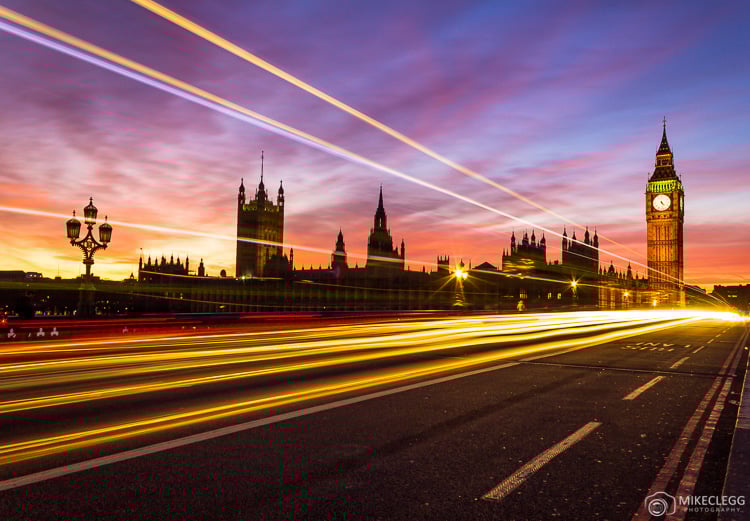
- Long exposures during the day: A cool thing you can do for day photography is to take long exposures using an ND filter and tripod. By doing this you can have wispy clouds, smooth silky water and motion blur for traffic and people. This requires a different technique, so read my post on taking photographs with ND filters if you want to know more.
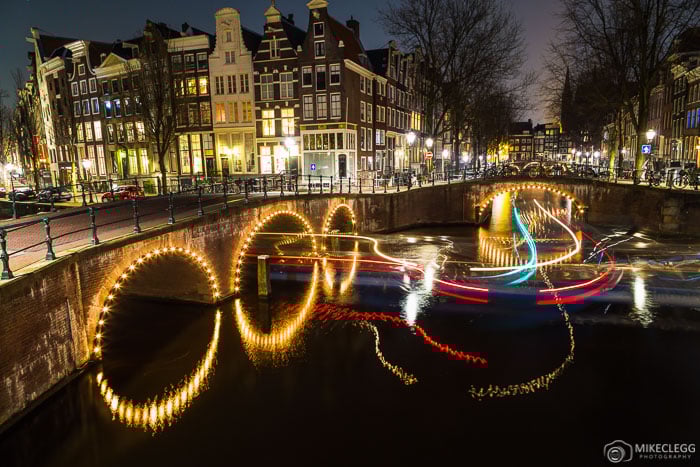
Night Photography
Taking pictures at night is probably my favourite type of travel photography. I love the way images look after a long exposure, especially when there is water involved.
Settings:
- Camera mode – Again I often use Aperture priority although many professional photographers shoot manual. I have always found that aperture priority gets a great exposure at night (using my Canon cameras).
- Aperture – Between f/4-f/16 – When choosing your aperture note that a narrower aperture (such as F/16), will often create a large starburst from lights such as streetlights, whilst a wider aperture (such as f/4) will create a smaller or no starburst. When shooting cityscapes or objects that are quite far away, a wide aperture will probably be sufficient; But when shooting objects that are close, or where there are lots of objects at different distances, you need to be more aware of your depth of field.
- Shutter speed – In aperture priority, this would be set by the camera.
- ISO – 100 – If your images are coming out underexposed, then consider increasing your ISO. But keep in mind that the higher you go, the more likely you will get noise,
- Drive mode – Use a 2 or 10-second timer or a hand remote to avoid handshake from pressing the shutter button.
- Focus type – I use manual focus for all my night’s shots. You can use auto if you find it’s getting you sharp images though.
Additional tips
- For night photography you will probably need a decent tripod, otherwise you will most likely get blurred shots. The tripod I use for all my shots is a Mefoto tripod.
- Consider using Live View (if you have it) to focus and check the exposure when preparing your shot. ‘Live View works very well on many Canon cameras although I can’t vouch for other brands.
Read my tutorial Photography Tips – Cities at Night for more info on night photography.
Why do I use these settings?
By using these settings I find:
- My pictures generally come out sharp.
- The images are well exposed with good detail in shadows, mid-tones and highlights.
- It’s not overly complicated.
- And my audience on Instagram seems to enjoy my pictures.

Further Learning
A few other suggestions we have to improve your photography includes:
- Reading Lonely Planet’s Guide to Travel Photography – This book allows you to learn from pro photographer Richard I’Anson. The book breaks down the steps of improving your photography from planning, techniques, as well as post-trip.
- Taking a course such as the Photography Masterclass course on Udemy – This course includes 22 hours of video and 60 articles and these courses are often on offer for not much over £10/$12. You also get a 30-day money-back guarantee should you not be happy.
- Finally, you could also read some other travel photography articles on this blog. From night photography, street photography to editing.
We hope this helps.
Note that the links above are affiliate links so we do get a small commission if you purchase.
Noticed a mistake? Let us know.