
Aperture is the part of the lens that lets in light. The technical word is F-Stop. Apertures often range from about F/1.2 (very wide) to F/32 (very narrow).
Wide Apertures
A wide aperture is generally a low number such as F/1.2-F/5.2. The benefits of using a wide aperture are below.
- You can shoot in less light without having to increase the ISO. But if it’s still too dark you would need to up the ISO or increase the exposure duration. Note if your Shutter Speed gets too slow then you may get handshake resulting in a blurry image.
- You would have a smaller depth of field and can introduce a nice bokeh effect (blurred background).
- Wide apertures are good for portraits and isolating objects such as below.

Small note on wide apertures. If you are trying to get a bokeh (blurred background) effect unless you are fairly close to the object you won’t get much of a bokeh no matter how wide your aperture is. This is because depth of field is relative to the distant to an object and the aperture size. I’ll go into this more in the future.
Small Apertures
Small apertures allow a larger depth of field. A small aperture generally would be higher than F/14.
Things that happen when you have a smaller depth of field are below…
- Larger depth of field resulting in more things in focus.
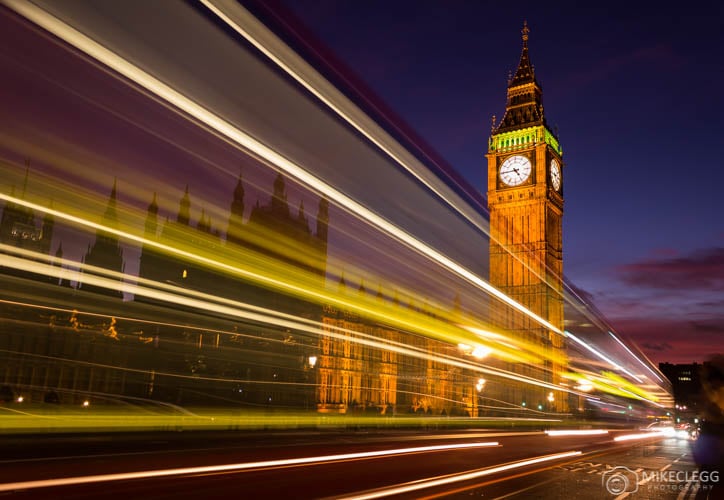
- An aperture above F/10 often introduces an attractive starburst effect to lights.
- Good for architecture and landscape shots where many of the objects you want in focus are on different focus planes.
- Often you’ll need a tripod if shooting in low light or at night due to slower Shutters Speeds.
Camera mode – Aperture Priority
Generally when I’m out and about, I have my camera set to Aperture priority (AV Canon, A Nikon). A good setting to have is F/8. This generally covers a good depth of fields for sudden shots you may have. You could also set your ISO (camera gain) to auto so as to stop the shutter speed going too low. A lot of cameras will prioritise shutter speed then ISO so as to prevent handshake and keep noise to a minimum.
| Previous: Start |
Next Tutorial: Shutter Speed |
Other photography posts:
Ultimate Tips for Travel Photography
Photography Tips – Techniques for Capturing City Skylines
Photography Tips – Cities at Night