")
Would you like to improve your travel photography so that you come back from your holidays with more than just memories? In this detailed guide you’ll find ultimate tips for travel photography, which will help you capture pictures from your trips that you’ll be proud to show your friends and family, print, or even sell.
Here are over 30 top travel photography tips to help you take better photographs during your trips.
Pre-Travel Tips
Travel photography isn’t about just heading out and taking photographs. You should do the following before you even leave, which will help you get better results.
1. Read books and magazines
If you are new to photography then the first thing you should do (after purchasing a camera) is to read books and magazines. You’ll learn techniques, see picture examples and start understanding just how to use a camera to capture a destination in an interesting way.
When I first realised that I needed to improve I purchased Lonely Planet’s Guide to Travel Photography (2012 edition)![]() and read every page from front to back. This book was excellent, really well written and really set me on the right track.
and read every page from front to back. This book was excellent, really well written and really set me on the right track.
I also subscribed to a magazine called Photographer World which was full of fantastic content, tips, interviews and inspiration.
 Click to Buy on Amazon
2012 edition
2016 edition![]()
2. Take a photography course
Another way to improve and learn more about photography is to take a photography course. Luckily this doesn’t necessarily mean you have to hire someone or do a face-to-face course as there are plenty of options online. Such as the Photography Masterclass Course you’ll find on Udemy which comes with 22 hours of video and over 60 articles. These courses are also very affordable due to sales and promotions where you can sometimes get them for around £15. I also take such courses and have found them to be really high quality.
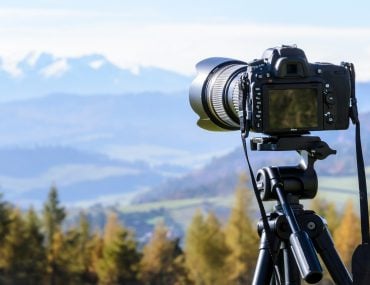
3. Decide on your equipment
Deciding what equipment you need can be a big decision. It really depends on what you will be using the images for and what kind of photography you are into.
For example, if you are taking pictures that you want to sell for prints or license to agencies, then you will probably need a camera that takes very high-quality images. But if you want images for your blog or for personal use, then a cheaper camera should be fine. Before you go travelling think of all the equipment that you may need, such as a tripod, filters, lenses, waterproof housing etc.
To see my full equipment list head to photography equipment recommendations.
To read an overview of different camera types head to What Kind of Camera do I Need?

![]()
4. Get plenty of memory cards and storage
Although memory cards and storage are related to equipment, I want to write a bit more about them.
Basically make sure you buy multiple storage cards for your camera, as well as multiple hard drives. Then it’s good practice to split your content across multiple memory cards when shooting, and also backup your work. When I travel, I use multiple Sandisk SD cards, and multiple Samsung Portable Hard Drives to spread the risk of losing my pictures.
5. Practice, practice, practice
All photographers have made mistakes and many experienced photographers still do. Photography can also be a trial and error process where you try things, they don’t work, so you try something else and it does work. As you learn you will likely make more mistakes, and as you get more experienced you will likely make less.
Before travelling try and learn everything about your camera, read the guide and do some test shots. This way you will be less likely to miss a moment when you are travelling.
6. Do your research before a photoshoot
Prior to going somewhere, do your research on things you want to see and take photographs of. Try and find good vantage points, especially ones that are publicly accessible.
Sometimes you may find blog posts that help you with this. For example, I have a blog post on the Best Viewpoints in Prague, as well as the Best viewpoints in Vienna and lots of posts on Instagram and Photography Spots for various destinations. Also, look on social media (such as on Instagram) for inspiration at what the locals and other travellers are taking pictures of.
7. Check when sunrise and sunset is
Before I arrive at a destination I always make a note of when sunrise and sunset is. These times are crucial to my photography so I often plan my day around them.
An amazing website for checking this is timeanddate.com which allows you to check the sunrise and sunset times for any day you want throughout the year (ie in the future), which is great for pre-planning.
8. Get adequate insurance
If you are lugging around expensive equipment, then make sure you have good insurance in the event of it breaking or being stolen. Hopefully, it will never come to that, but it’s always best to be prepared just in case. If you are based in the UK an option is photoguard.co.uk who have good pricing and policies. I’ve never had to make a claim though so I can’t comment on my experience regarding that.
Tips for Taking Travel Photographs
Now for the fun bit, actually taking photographs during your travels.
9. Have some default settings
When I’m walking around I normally have my camera settings set on aperture priority and at F8. I also have my ISO on Auto and set a minimum shutter speed of at least 1/125. These are just my default settings which I will then adjust depending on the scene and what I am trying to capture. If you prefer you can also have your camera on auto as default.
You can read My favourite settings for Travel Photography to learn more about the settings I use for different scenarios.
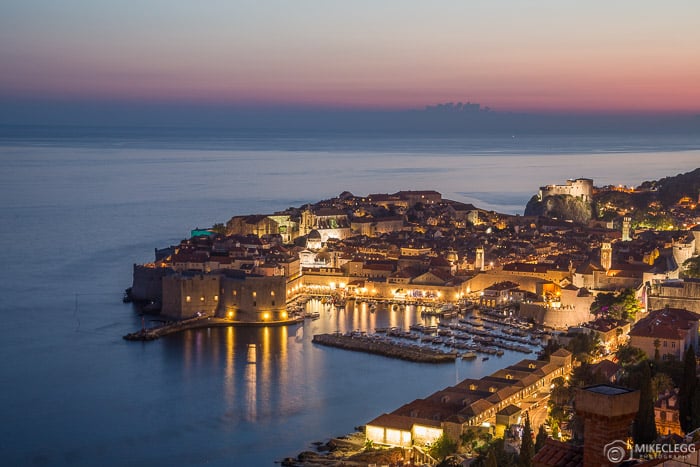
10. Scout out locations as you explore
While you are exploring a destination, keep an eye out for the best spots for sunrise, sunset, blue hour and night shots.
As I explore I will constantly be looking for good vantage points based on where the sun may be. This was the case when I was in Dubrovnik where I spent a good couple of hours looking for the perfect spot to get a high vantage point of the Old Town at dusk.
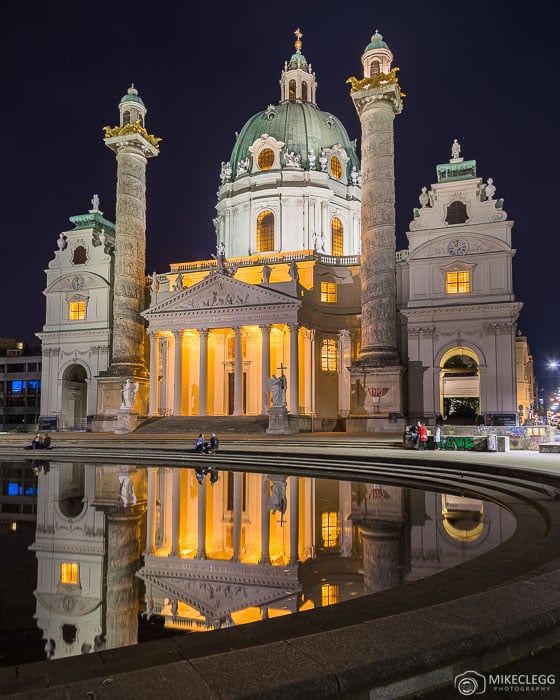
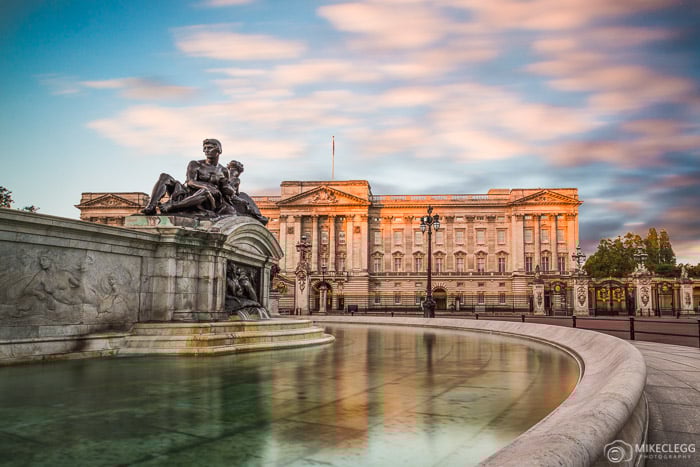
11. Use reflections
Reflections will help balance your image and is a great way of framing for Instagram (as it’ll make it easier to make square or portrait images). You can capture reflections from things such as rivers, lakes, puddles, shiny vehicles, windows etc, to name a few examples. Note if there is strong wind you may struggle with rivers and other water features.
Read more and see examples in my post: Photography Tips – Reflections
12. Think about composition and framing your picture
A good way to draw a viewers attention to certain elements of a picture is to frame it. You can do this with foliage and other elements in the scene. Framing in such a way will also make the image that much more interesting and will help the viewers understand what the destination is like.
Read more on composition: Composition Techniques For Better Travel Photographs
13. Add people or stand-in
Standing in or adding people in the photos is a great way to add a sense of scale and make a photo more interesting. I often find on Instagram that by adding people my engagement is much higher. By including people in your photos it also helps make your viewers imagine being there and having the same experience.
14. Use the golden hour (sunsets and sunrises) for beautiful light
Many photographers love the golden hour and for good reason. During sunrise and sunset, you will often see the sky lit up with wonderful colours which makes everything look beautiful. Unfortunately, this timeframe is short, so it’s worth getting the sunset and sunrise times off timeanddate.com and making sure you are in a good position well before.
Read more: Photography Tips – Shooting in the Golden Hour
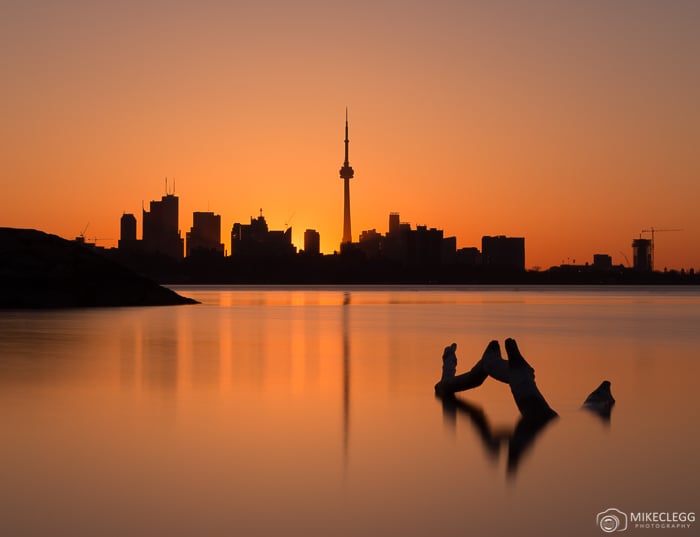
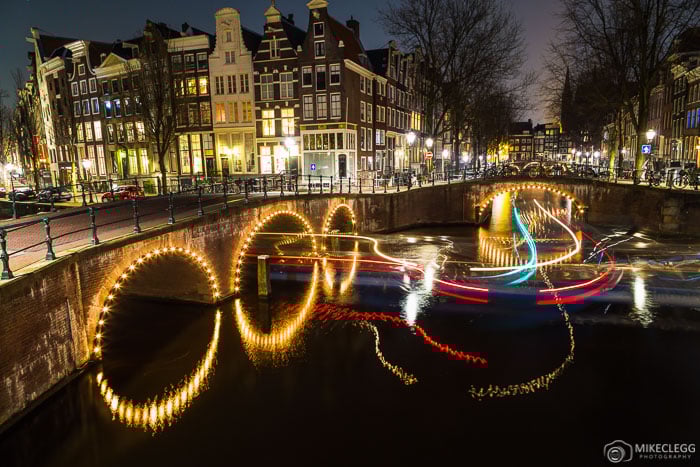
15. Shoot during the blue hour and at night
At night many cities light up their buildings and skyline. This can look incredible in photographs and often adds a wow factor to the image. This is one of my favourite times of day to go and take photographs.
I often find that my night photographs tend to do the best on my Instagram account too. Reflection shots on water generally look better at night and you can also capture light trails from moving vehicles.
To read more about night photography techniques, check out: Photography Tips – Cities at Night
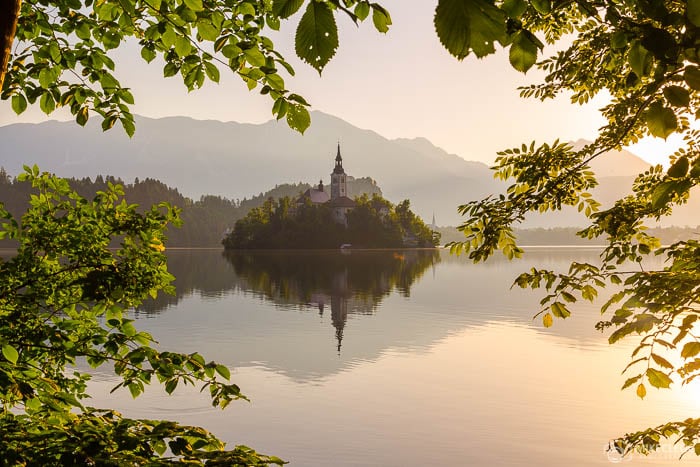
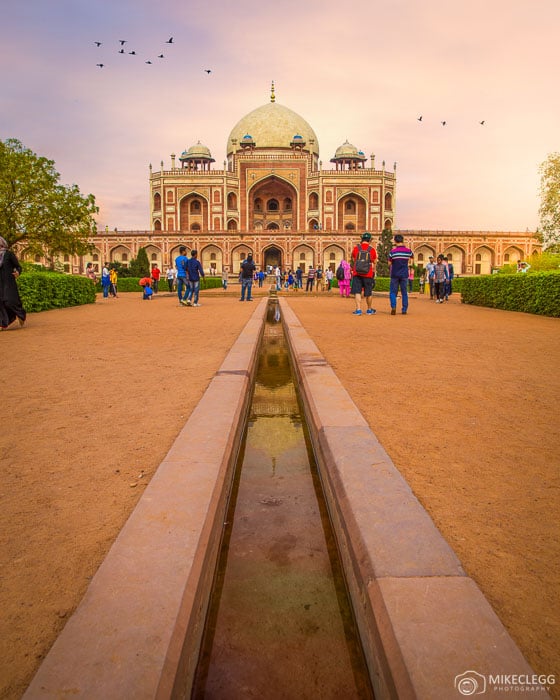
16. Use leading lines
Using leading lines in photography is a powerful technique, that is designed to lead a viewers eye to the main element or subject. In the image below I am using the water feature to lead the viewer’s eye to the temple at the end of the image.
17. Head out early
Popular tourist attractions can often be rammed full of people during the main daytime hours, so if you want a clean picture with minimum or no people then get up early and get to the location before anyone arrives.
This can still be difficult for example on Charles Bridge in Prague, where you will probably never find it completely empty. Go early though and you will for sure have a lot fewer people.
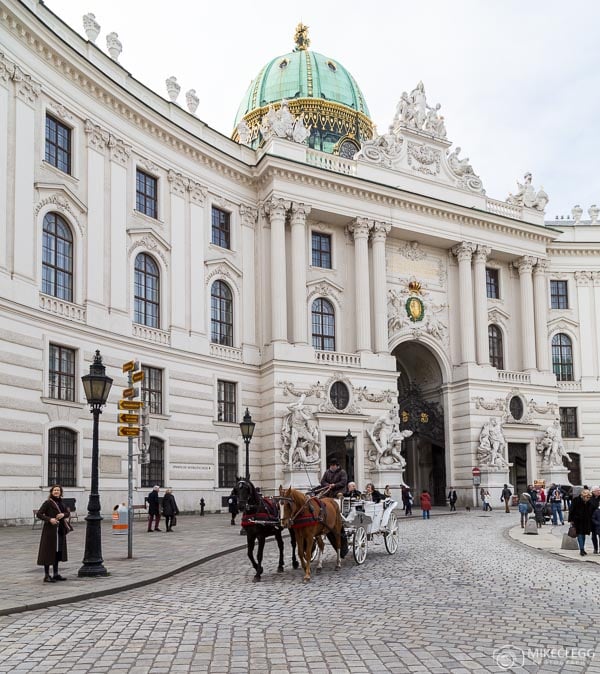
18. Capture street scenes
You make think that taking a picture of a street is easy, but actually, it’s really not. Streets are often crowded, have cars and other annoying objects on them, and can quite simply be really difficult to show the beauty of what you see.
A few techniques you could use when capturing streets is to either:
- Be patient and wait for people to pass.
- Shoot wide so people and objects make up less of the image.
- Add interesting elements to the image such as local attractions and features such as the Vienna Fiaker seen below.
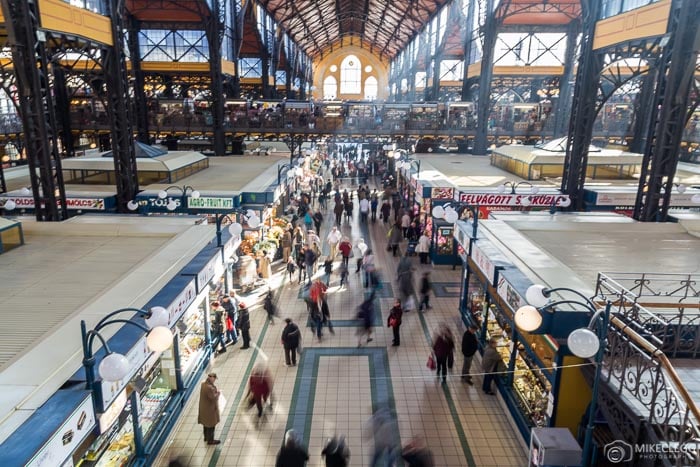
- Use a long exposure to blur the people to give a sense of motion (example in the next tip).
Read more about capturing streets and more examples: Photography Tips – Capturing Streets
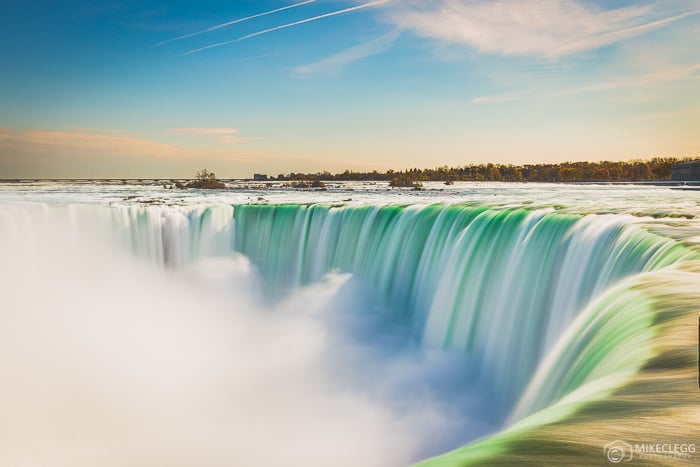
19. Experiment with daytime long exposures
Using an ND filter to take photographs will lengthen the time needed for the camera to capture an image. This technique is often used to take pictures where water is smooth and silky, or where clouds are whisky.
Read more: Photography Tips – Taking Photographs with an ND Filter
Another way to use ND filters is to blur people so that they either disappear or appear a bit blurred. This is good for busy scenes such as museums, stations etc.
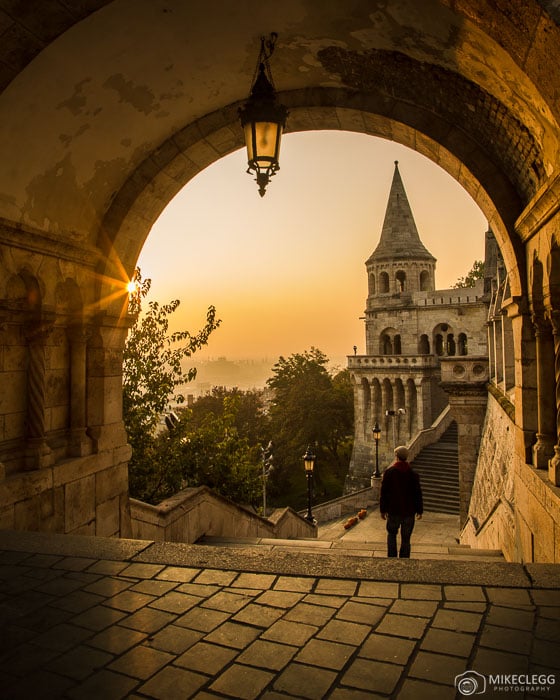
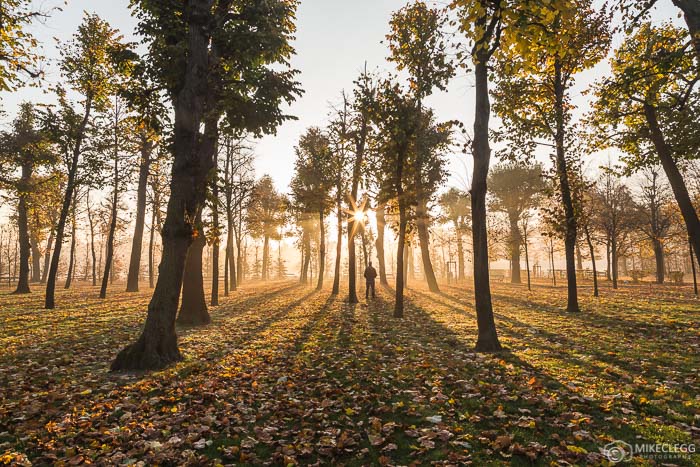
20. Add sunbursts and sparkles
A good way to add a little bit of magic to a photograph is to use the sun to your advantage and add a sunburst or sparkle effect.
To do this use a high aperture such as F11-F16 and position the sun at the edge of an object. Ie below I’ve positioned the sun so only a fraction of it is visible around the trees, and using the suggested aperture setting it will add the sunburst/sparkle effect.
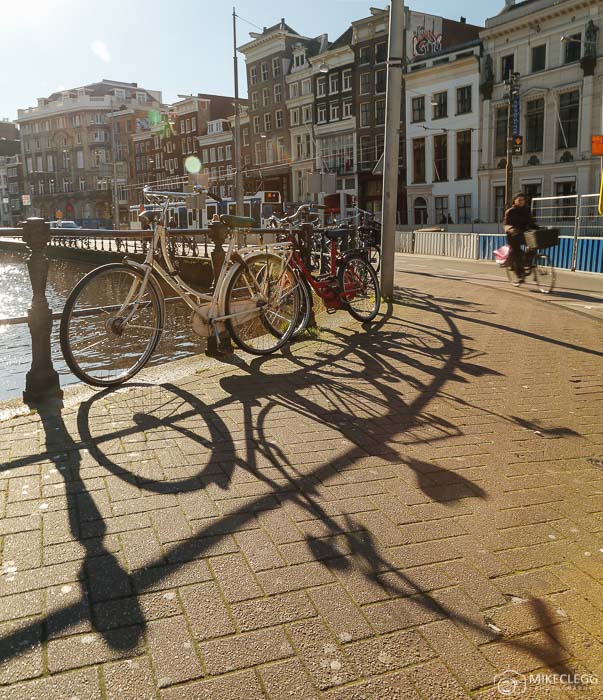
21. Use shadows in your pictures
A strong technique but not that easy to do is to use shadows to enhance your composition. Seen below you can see where I have used the shadows from the bikes.
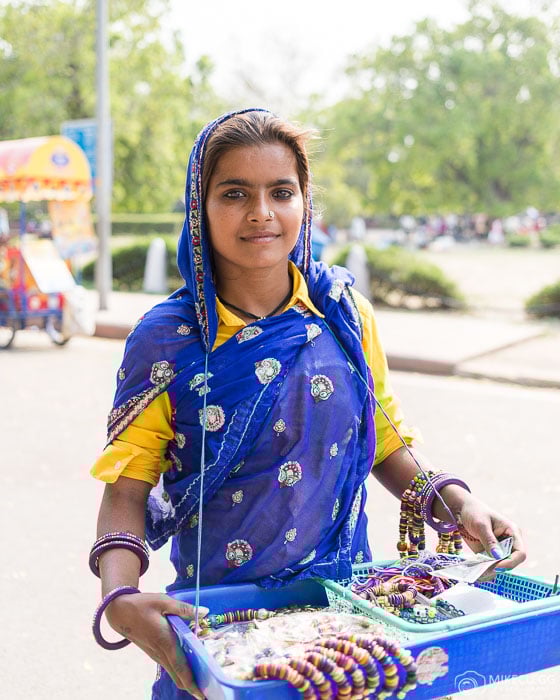
22. Take pictures of people
When taking photographs of people use a wide aperture such as F1.8-F4 (depending on your camera). This will create a separation between the person and the background. Note: on cameras with small sensors (small compacts), it will be more difficult to create this effect due to how the depth of field works.
If you see someone who would make an interesting photograph, it’s always polite to ask, and in some countries, you may be expected to give a little cash in exchange for the photograph.
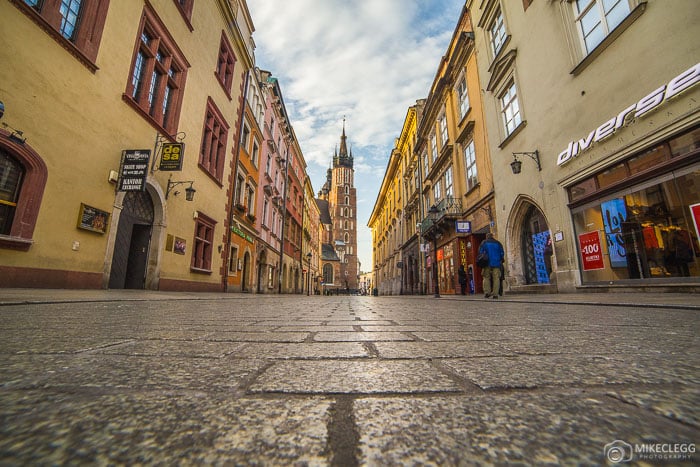
23. Get low down with your camera
Getting low to the ground can provide some interesting perspectives. Things such as nice patterns, cobbles and more can add a lot to the scene. It can often lead the viewer’s eye and is a powerful composition technique.
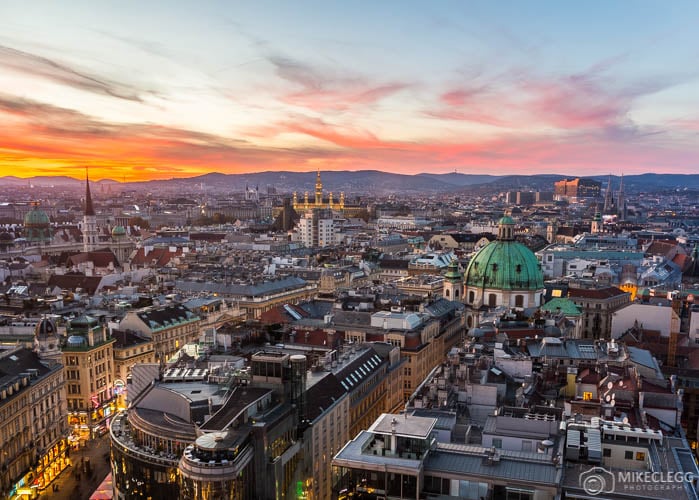
24. Take pictures from high up
If possible get as high as possible. Many cities have publicly accessible viewpoints where you get incredible views such as below. These can be great places to capture the sunset over the destination as well.
When planning a trip you could also consider staying in hotels that have good viewpoints, or research whether there are any bars or rooftop patios in the city.
25. Shoot using a wide-angle lens
Wide-angle lenses are great for taking photographs where you want to capture more in the frame. A wide-angle lens may be a lens with a focal setting of 24mm or wider. Good places to use a wide-angle lens include:
- To capture the inside of buildings such as churches, hotels, museums etc.
- When outside and the subject is large but there isn’t much room to stand back.
- To capture crowded places and make people appear smaller.
- To make capturing pictures of reflections easier.
26. Shoot using a telephoto/zoom lens
By using a zoom (telephoto) lens you can compress a scene so that objects that are far from each other appear to be a lot closer together. It’s a cool effect and the best way to use this technique is to stand back from the foreground object and then zoom to pull the foreground and background together. You may also want to use selective focus on the foreground object.
Post-Travel Photography Tips
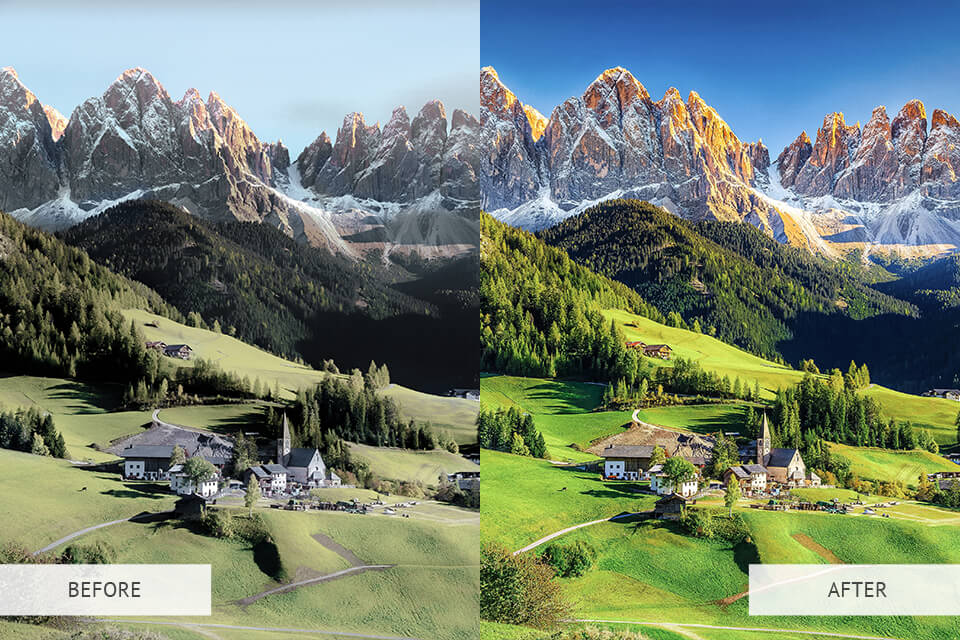
27. Post-processing/Editing
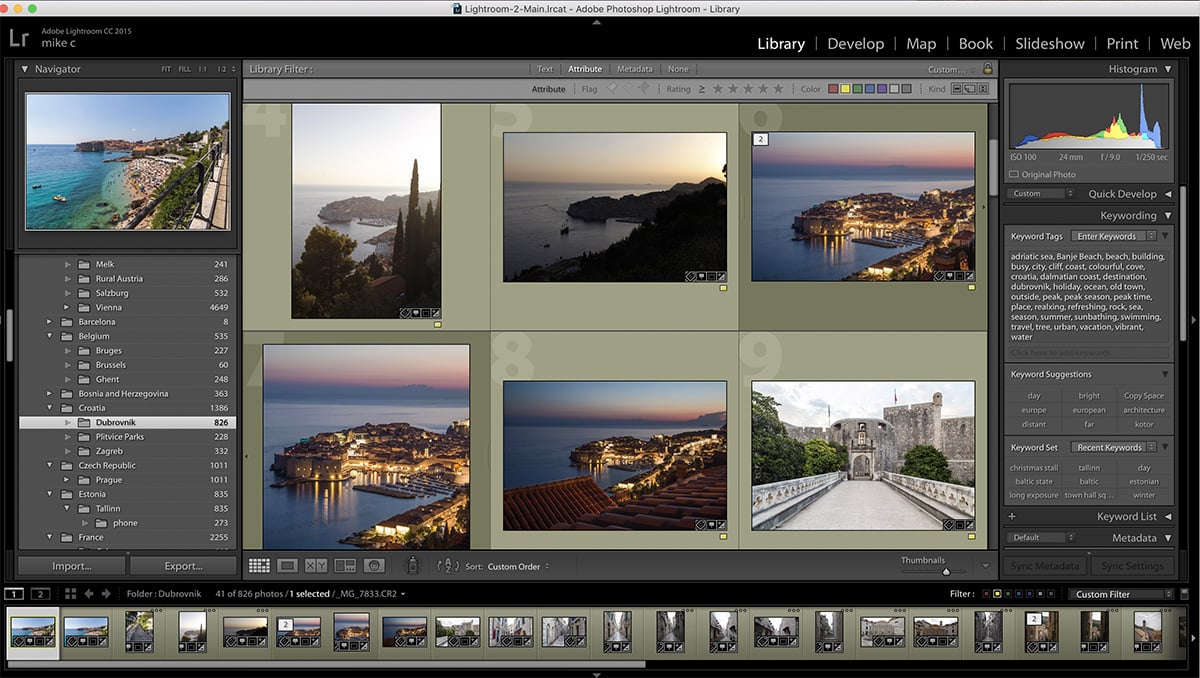
Lightroom
I often use Adobe Lightroom for almost all my photo editing and love it. It’s easy to use, helps keep your photo library organised and has powerful editing tools. With Lightroom you can adjust the colours in your images, add filters, correct issues such as the highlights being overblown or the shadows being too dark and much more. With Lightroom you can also download/buy presets (or make your own) which can save you lots of time with the editing process, but also allow you to make all your images look similar/have the same style, which is important on Instagram.
Luminar 3
An alternative to Lightroom is Luminar 3 by Skylum. This software is also fantastic and I will be writing a proper review soon. This software has some incredible features including AI adjustment which can transform your images into something incredible with minimal effort. So far I have been very impressed and will be testing it out more before sharing with you.


28. Share your pictures on social media
After your trip or even during it, you may want to share your pictures. Social Media is fantastic for this and for so many reasons including:
- You will likely be inspired by other photographers on techniques as well as places to visit.
- It will allow you to your work with others and get opinions and critiques.
- You might make friends from all over the world.
- You may get opportunities to work with cool brands.
- The positivity from comments can be a big motivator to push yourself to make more interesting images.
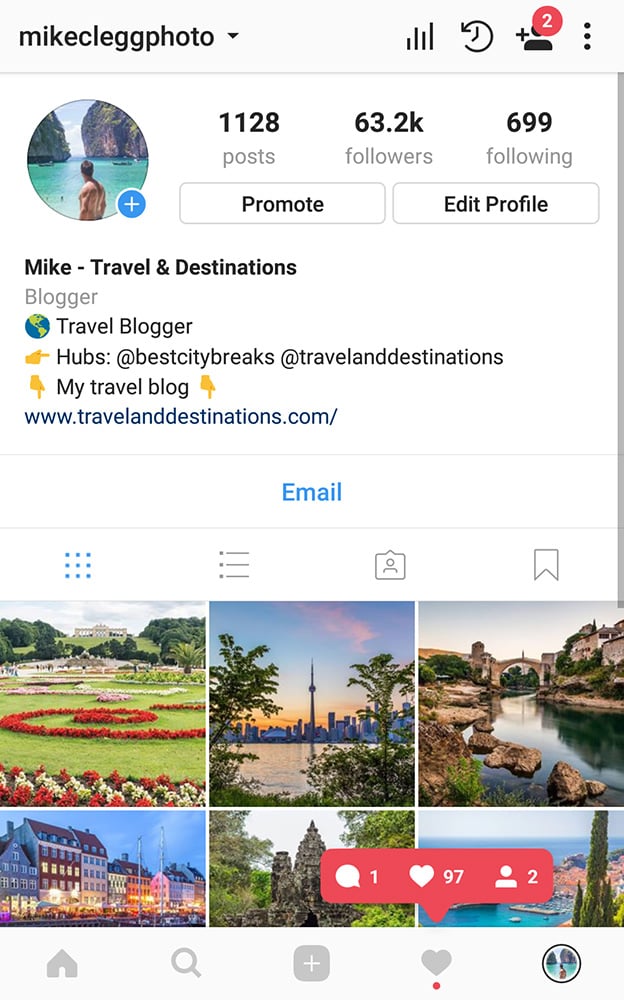
I currently publish my work on as many social media channels as I can, with Instagram being my favourite medium. If you want to see some of my photos head to my account @mikecleggphoto.
More blog posts on Instagram:
Photography Tips – Building an Instagram following
Tips on Getting Reposted by Feature Accounts
Instagram – How to Build a Successful Feature Account
29. Make backups of your pictures
Backing up your photos is extremely important. The last thing you want is to spend huge amounts of your time taking photos and then lose them during your trip.
You can backup your photographs on portable hard drives or better back them up online.
Backing up online isn’t always possible as it does depend on the internet connection you have available. But if it’s possible it’s worth looking into. A couple of ways you can backup online include using Google Photos, or a service such as Smugmug (paid service). There are tons of other services available so just look around.
30. Sell and license your photos
A good way to travel and manage to pay for your trips is to license or sell your photos through agencies such as Dreamstime, Alamy and Fine Art America. It takes a lot of hard work and your work needs to be very high quality, especially for licensing agencies. If you are interested in selling your photos this way consider reading my guide: 5 Steps to make money from your travel photos.
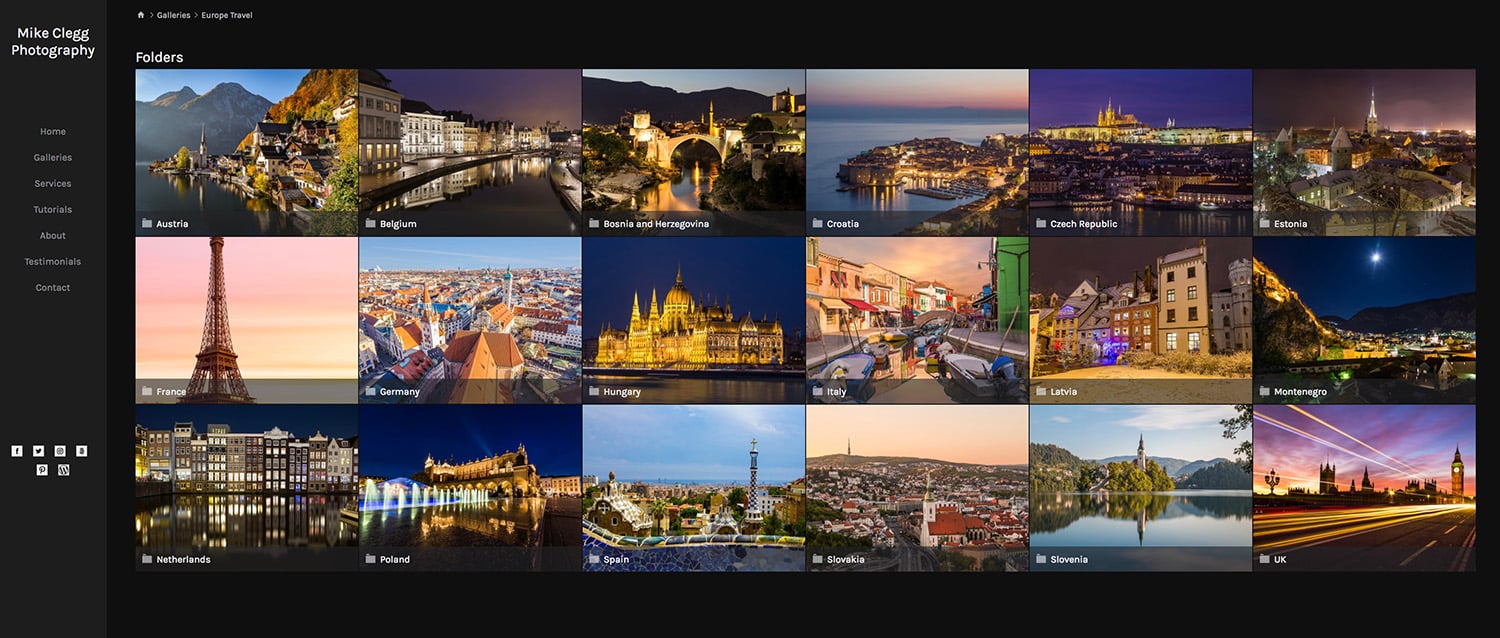
31. Create a photography portfolio
If you are a keen photographer and want to show your work, then a professional thing to do is to have a good photography portfolio! I currently use Smugmug for my photography portfolio (mikecleggphotography.com). The software and team who make it are pretty fantastic and I highly recommend it. Head to my post Top Reasons to use Smugmug for your Travel Photos to read more about why I recommend this platform.

How Did I Get Started With Travel Photography?
Finally here is a little bit about how I got started in photography.
So, since I was young I have been travelling frequently, visiting as many places as I can fit in (and could afford) each year. I have always taken lots of photographs on my travels, but in the past my images were poor and now only serve as memories on my hard drive.
Now after lots of practice, travelling, reading, and mistakes I would consider myself an experienced travel photographer and I also make part of my income through licensing my photographs. You can see many of my travel photographs on my portfolio: mikecleggphotography.com and also find many of my images on my personal Instagram account.
Summary
These are some of my best tips for travel photography which will hopefully help you plan and take better pictures when you travel. One of the main things I will say is that photography, in general, takes a lot of practice and patience, but over time you will see your images naturally getting better and better. Just don’t give up, head out and start taking pictures! Have fun and good luck!
Noticed a mistake? Let us know.