When you get back from an amazing trip, you’ll probably want to show your friends and family what you’ve got up to and some of the experiences you’ve had. But sometimes things can go wrong, and you lose your photos. This can be a nightmare, and incredibly upsetting and disappointing.
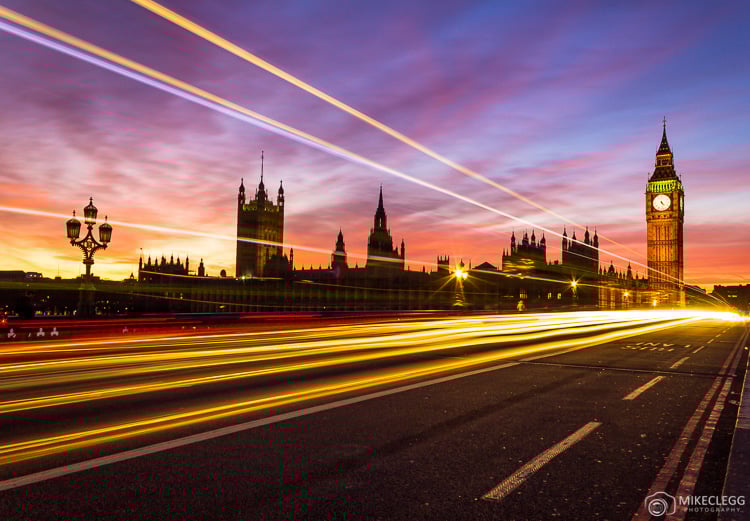
You may have spent hours capturing these photographs and got up really early or stayed out late. You may have also had the pleasure of beautiful and colourful skies or other conditions allowing you to capture that perfect photograph.
Luckily, there are plenty of ways to ensure that your images are both protected and backed up in the event that something does go wrong.
Below you will learn more about backing up your pictures and find suggestions on the best ways to back up your travel photographs.
The importance of backing up your travel photos
Imagine this: you embark on a once-in-a-lifetime journey, capturing breathtaking landscapes, vibrant cultures, and unforgettable experiences with your camera. These photos become cherished memories that you eagerly look forward to sharing with friends and family. However, accidents happen, and without a backup, an unforeseen event could wipe out all your photos in an instant. By backing up your travel photos, you ensure the preservation of these precious moments, providing peace of mind and the ability to relive your adventures for years to come.
Common risks of not backing up your photos
Failing to back up your photos while travelling exposes you to several risks.
One common risk is the loss or theft of your camera or memory card. Picture this: you’re exploring a bustling market, engrossed in the vibrant atmosphere when you suddenly realize your camera is missing. Along with the loss of your camera, your irreplaceable travel photos vanish into thin air.
Another risk is the accidental deletion or corruption of files. With limited storage space on your devices, you may hastily delete photos to make room for new ones, only to realize later that you’ve deleted cherished memories.
As well as this, your camera or memory card could malfunction, rendering all your photos irretrievable. These risks emphasize the need for a reliable backup solution.
All of the above could still happen even if you have made backups but by regularly backing up you are minimizing the risk of losing everything.
Different methods for backing up your travel photos
1. Take an external USB drive or laptop
During your trip make sure you do regular backups of your photos. This could be onto an external drive or laptop. Especially after you’ve captured some prized gems. I use several USB Portable Hard Drives![]() which I find work really well. I then duplicate the files across several of these drives. When buying an external hard drive due to the size of photographs these days (especially if you’re shooting in RAW mode) you’ll likely want a drive that is 1TB minimum, although we’d recommend at least 2TB, as that’ll last you much longer if you take a lot of photographs (or even videos).
which I find work really well. I then duplicate the files across several of these drives. When buying an external hard drive due to the size of photographs these days (especially if you’re shooting in RAW mode) you’ll likely want a drive that is 1TB minimum, although we’d recommend at least 2TB, as that’ll last you much longer if you take a lot of photographs (or even videos).

![]()
2. Back images up online
If possible always transfer and backup your images online. You can use different online systems such as Smugmug, the Cloud, Google Photos, Amazon Prime, or Dropbox to name just a few services.
It can sometimes be hard to backup raw files online as they are much bigger files and this can cost a lot more too, so often backing up jpeg versions of the files is your best bet.
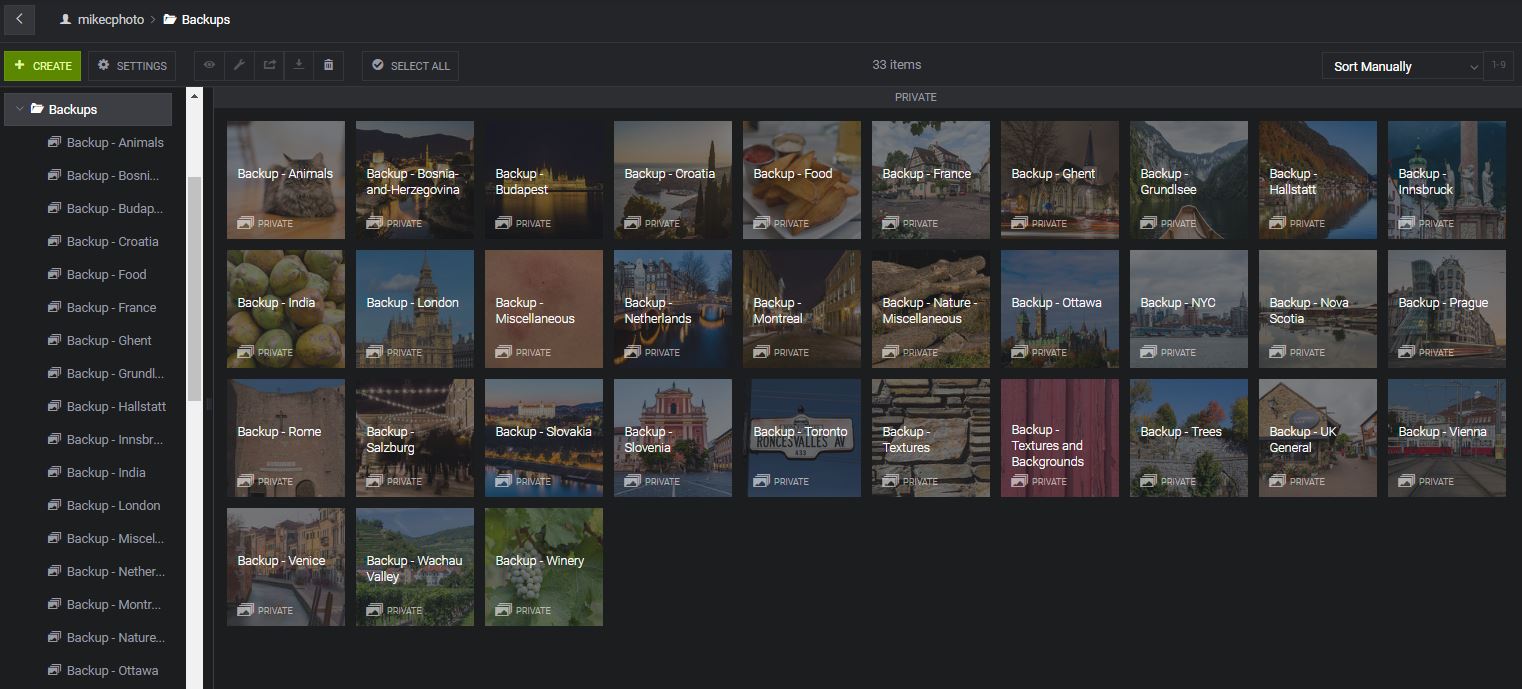
I currently use Smugmug for all my backups and have done so since 2014. With Smugmug you can upload unlimited high-quality images and they are also easy to download in bulk or individually afterwards. Smugmug is actually a paid service (although very cheap), and you can also get a 14-day free trial so as to test it out.

3. Use multiple memory cards
Sometimes memory cards fail or get lost. By having multiple cards and using them all to take photos you can spread the risk. I use multiple SanDisk Ultra 32GB Memory Cards![]() during a trip and often use different cards each day. Memory cards are really cheap these days which means you can get several high-capacity cards without spending much at all. Using memory cards along with backing up onto external hard drives gives me peace of mind I am doing everything I can to protect my photographs.
during a trip and often use different cards each day. Memory cards are really cheap these days which means you can get several high-capacity cards without spending much at all. Using memory cards along with backing up onto external hard drives gives me peace of mind I am doing everything I can to protect my photographs.

![]()
Organizing and categorizing your backed-up photos
Backing up your photos is not just about safety; it’s also about convenience and accessibility. To make the most of your backup, organizing and categorizing your photos is essential. Here are some tips to keep your backed-up photos organized:
Create folders: Divide your photos into categories or destinations/places and create separate folders for each. This makes it easier to locate specific photos when you want to reminisce about a particular place or event.
Tag and label: Many backup solutions offer the option to add tags or labels to your photos. Utilize these features to add keywords or descriptions that make searching for specific photos effortless.
Date-based organization: If categorizing by destination is not your preference, consider organizing your photos chronologically. This allows you to easily track your travel journey and relive your experiences in sequence.
Add descriptive names: If you want to be super organised then you could also consider renaming your photo files with descriptive names that indicate the location, date, or subject. This helps you quickly identify the contents of each photo without opening them.
Tips for safely transferring and storing your backup devices
Ensuring the safety of your backup devices is as important as backing up your photos. Follow these tips to transfer and store your backup devices securely:
Carry-on your backup devices: When travelling, always keep your backup devices in your carry-on luggage. This ensures that they remain with you at all times, minimizing the risk of loss or theft.
Use protective cases: Invest in sturdy and shockproof cases for your external hard drives or portable storage devices. These cases provide an extra layer of protection against accidental drops or impacts.
Store in different locations: If possible, store your backup devices in separate locations. This safeguards against the loss of all backups in the event of theft, damage, or misplacement.
Consider encryption: For added security, encrypt your backup devices to protect your photos from unauthorized access. Most external hard drives and port
Summary
These are some of the best ways to backup and protect your photographs. Backing up your travel photos is a crucial step in preserving your cherished memories. By understanding the risks of not backing up, exploring different methods like cloud storage, external hard drives, and backup apps, and implementing organization and security measures, you can ensure the safety and accessibility of your photos while you travel.
Don’t let unforeseen events or accidents rob you of your precious memories. Take the time to backup your photos, and enjoy the peace of mind that comes with knowing your travel experiences are preserved for a lifetime.