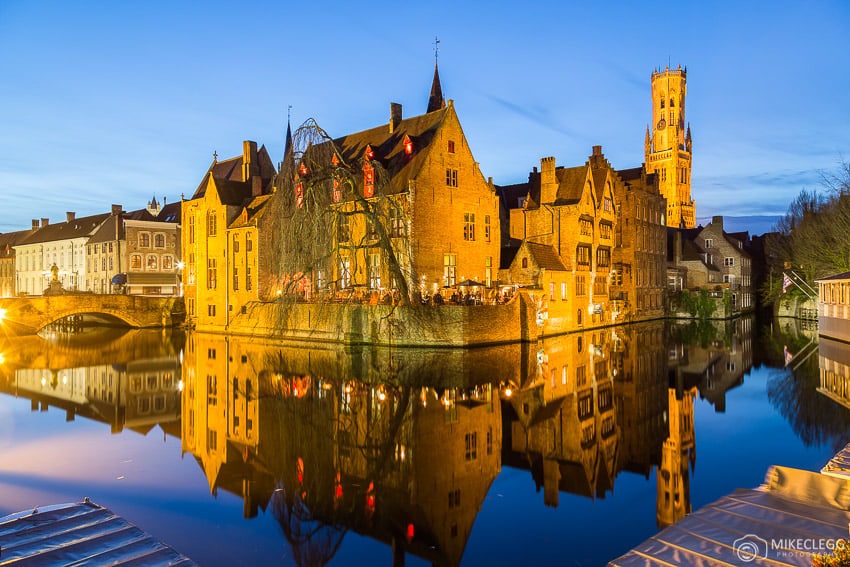
Long exposure photography is a technique that allows you to capture stunning images by extending the shutter speed of your camera. It can create unique and mesmerising effects, such as silky smooth waterfalls, light trails, blurred motion effects and star trails. It is a great and fun way to take pictures when you travel and this is more so as many buildings and landmarks often get lit up at night. So by taking long exposure images, you can capture a much better quality and more interesting final image.
Below we will delve into the world of long-exposure photography and explore the techniques, equipment, and tips to help you capture breathtaking images. You will also find various long exposure photography examples too, along with their settings.
Understanding the basics of long-exposure photography
Before diving into the intricacies of long-exposure photography, it is essential to understand the basic concept behind it. Long exposure photography is a technique where you use a slow shutter speed so as to open the shutter and capture an image over an extended period. This extended exposure time allows more light to enter the camera’s sensor, allowing you to take pictures in less light.
To achieve long exposure shots, you will need a camera with manual or aperture priority settings. Although many compact cameras and even smartphones can offer this functionality, a DSLR or mirrorless camera is a good choice. These types of cameras allow you to control the shutter speed, aperture, ISO and many other settings manually – so you have much more control. As well as this a sturdy tripod is crucial to keep your camera completely still during the long exposure.
Benefits of long exposure photography
Long-exposure photography offers numerous benefits that make it a captivating technique for photographers.
First, long-exposure photography is a very fun technique and it can be rewarding too. By elongating the exposure time, moving subjects, such as flowing water, passing cars, or even slow-moving clouds, transform into smooth and ethereal elements.
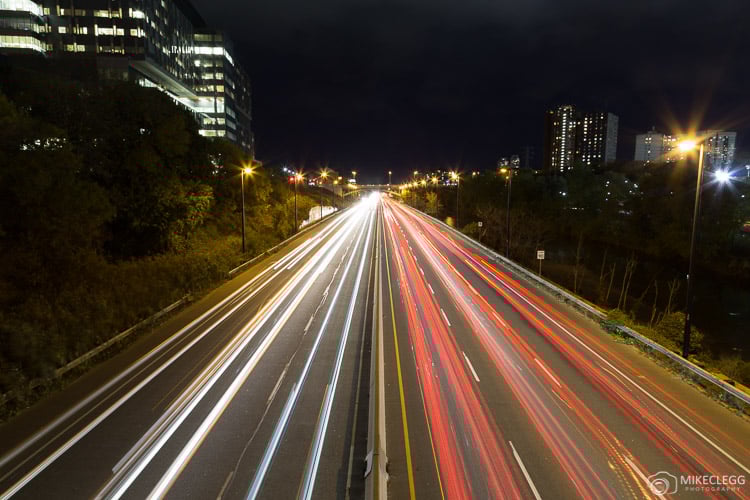
As well as this long exposure photography can help you create unique and surreal landscapes. By capturing the moving clouds or star trails, you can add a sense of drama and dynamism to your images. This technique also enables you to capture light trails from moving vehicles, giving your photos a vibrant and urban feel. You can make a boring road look significantly more interesting.
Finally when taking pictures at night often you’d need to use a higher ISO (camera sensor gain), but this can result in lower-quality images. By using long exposure techniques you’ll be able to take a much higher quality image as you won’t need to use a high ISO but instead will rely on the shutter being open for longer instead.
Equipment needed for long-exposure photography
For your long exposure photography journey, you will need some essential equipment. As mentioned earlier, a camera with manual settings (or aperture priority) is crucial. Additionally, a decent tripod is a must to keep your camera steady during long exposures. This will prevent any unwanted camera shake and ensure sharp images.
A remote shutter release or cable release is helpful and this allows you to start the exposure without actually touching the camera. As a result, this will help to minimize the risk of camera shake. The timer delay option which is often built into the camera can also be helpful if you set it to 10 seconds.
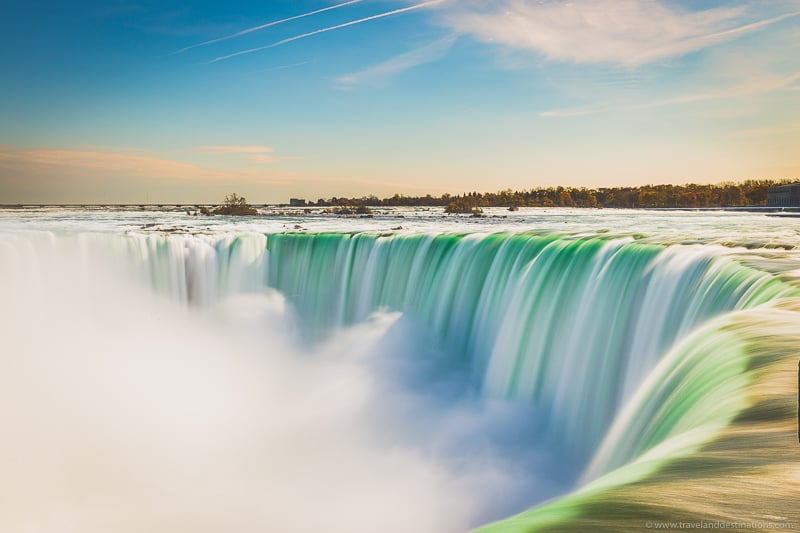
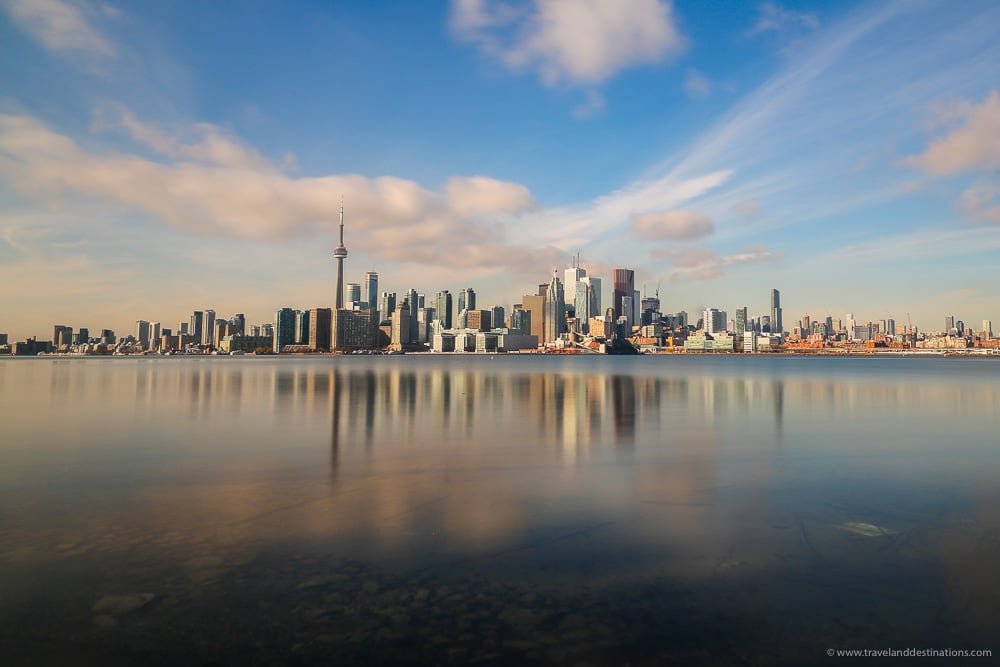
For daytime long-exposure photography neutral density (ND) filters are essential. These types of filters work by reducing the amount of light that enters the camera, therefore allowing for longer shutter speeds even in bright conditions. You can get ND filters which are around 10 stops and this can allow you to take pictures in fairly bright light. Such as the next picture below.
Techniques for capturing stunning long exposure photographs
Now that you have the necessary equipment, it’s time to explore some techniques for capturing stunning long exposure photographs. One popular technique is capturing silky smooth waterfalls. By using a slow shutter speed, you can transform the cascading water into a dreamy, flowing mist. Try experimenting with different shutter speeds to achieve the effect that you’re after.
When taking long exposures during the day and with bright sunlight even if you’re using an ND filter you may also need to reduce your f-stop (aperture) to a much higher number. Below I used an f-stop of f/22.
Another technique is creating light trails. Find a location with moving vehicles, such as a highway or busy street, and set up your camera on a tripod on a bridge overlooking it. Select a long exposure time and photograph the moving vehicles. The lights of the cars will create beautiful streaks across the frame, adding a sense of movement and energy to your images.
Full steps for taking long exposure images
- Set your camera up on a tripod.
- If your lens has lens stabilization then turn this off. This can interfere if you’re using a tripod.
- Check your ISO is as low as possible. Normally this would be ISO 100.
- Compose/frame your shot as you’d like it.
- Switch to manual focus and use live view (where you can see the live image on the camera screen) to focus on an element in the photograph that you want to be in focus. Sharp sections of a building such as windows, the roof, as well as any text/signs are good options.
- Use either manual mode or aperture priority to exposure for the scene. The darker the scene the longer the shutter speed you will need. For daytime long exposure photography the ND filter will act as a way to allow longer exposure times.
- Once your scene is in focus then use either the self-timer option, a remote shutter release or a cable release to trigger the shutter. As the camera is capturing the image be sure not to touch or knock the camera or tripod.
- Finally check your image is sharp by viewing it on screen and zooming in. If not then try again. If there are any vibrations that you can’t avoid such from a bridge then consider increasing your ISO slightly so the exposure time is a bit shorter.
Tips for capturing stunning long-exposure images
While the techniques mentioned above form the foundation of long-exposure photography, here are some additional tips to help you capture even more stunning photos. Firstly, always shoot in RAW format. This will give you more flexibility during the editing process and allow you to recover details in both highlights and shadows.
Additionally, pay attention to the composition of your images. Look for interesting foreground elements that can enhance the overall visual impact. Experiment with different angles and perspectives to create unique and captivating compositions.
If you’re struggling to get the image sharp such as you’re on a bridge and there are unavoidable vibrations or other reasons then try increasing the ISO a little. This will mean that the shutter speed won’t be quite as long and so any blur caused by vibrations may be minimised.
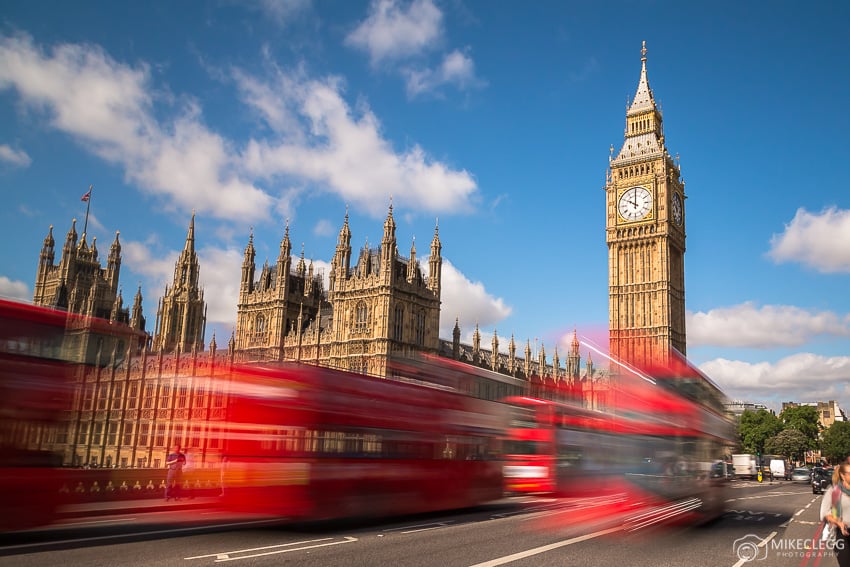
You can also increase the ISO a bit to try and make people appear in the image a bit more without disappearing or being a strange streak. We sometimes increase our ISO up to 800 or more in certain situations. Below is an example.

Daytime long exposure photography techniques
Long-exposure photography is often associated with low-light conditions, such as night or twilight. However, it is also possible to create stunning long-exposure images during the daytime. One technique is to use a strong ND filter to block out most of the light, allowing for longer exposure times. This technique can create surreal effects, such as blurred skies and smooth water surfaces even in bright sunlight.
Another daytime long exposure technique involves capturing cloud movement. Find a scene with interesting cloud formations, set up your camera on a tripod, and select a longer shutter speed. As the clouds move across the frame, their motion will be captured, creating a sense of dynamism in your images. The more the clouds are moving the more interesting the clouds will look.
Fun things to do with long-exposure photography
Long exposure photography can allow you to capture very creative images. Aside from the traditional techniques mentioned above, you can experiment and have fun with this technique.
One exciting idea is light painting. By using a flashlight or other light sources, you can “paint” light onto your subjects while the camera’s shutter is open. This can result in magical and otherworldly images. @dariustwin on Instagram creates incredible images using this technique.
You can also try capturing star trails. Find a location away from light pollution, set up your camera on a tripod, and select a long shutter speed. As the Earth rotates, the stars will appear as streaks across the sky. This technique requires patience and planning, but the resulting images can be truly breathtaking.

Editing long exposure photographs
Once you have captured your long exposure photographs, the editing process is equally important in bringing out their full potential. Start by adjusting the exposure, contrast, and white balance to achieve the desired look. Pay attention to the highlights and shadows, ensuring that there is a balance between the two.
Experiment with different editing techniques, such as increasing clarity or adding a subtle vignette, to enhance the overall mood of your images.
The tool we recommend for editing images is Adobe Lightroom which we’ve used for many years and find it very intuitive and beginner-friendly.

Summary
Long-exposure photography is a fascinating technique that allows you to capture mesmerizing images with an element of motion and time. By understanding the basics, acquiring the necessary equipment, and exploring the various techniques and tips, you can enjoy a creative journey that will result in stunning long exposure pictures. This can really help when travelling as you will be able to capture more interesting and higher quality images, especially at night when landmarks and other attractions light up.