The way you edit your photographs can have a big impact on the final result. Most people will have their own style and idea of what they want their final images to look like, but if you’re just starting out and don’t know much about photography then you may not know where to start. This article is a brief introduction/guide with 5 easy editing tips that should make your photographs look better and would be perfect for beginners.
You can use these editing tips with almost any editing app. A popular tool for editing photographs that we use is Lightroom CC on desktop, although you can find plenty of mobile apps to use, as well as online editors. A few good apps for your phones and tablets include Lightroom Mobile, Snapseed, VSCO, Fotor, Instagram and various others.
So, here are 5 easy editing tips to improve your travel photos. The suggestions below can all be used to quickly improve your pictures and make them pop.
1. Crop and straighten your images
The first thing to do when editing your images is to crop and straighten them. By cropping you will be able to bring more focus to the subject and remove distractions. Straightening your images will also make your pictures look more professional and pleasing to the eye.
A good way to ensure your pictures are straight is by looking at the horizon line and then slightly rotating the image until it looks good. Editing tools often provide a grid that appears when you’re editing and this will help you to straighten your pictures.
Some apps provide options which will auto-straighten the image for you as well.
2. Lower the highlights
When shooting during the day or even at night you may want to lower your highlights. This will make bright elements in your image look less bright and distracting. It can also help to bring out more detail in that part of the picture. If you’re capturing your images in RAW format which is common when using DSLR cameras then you’ll have even more information to work with on your pictures and again this helps to bring out even more detail.
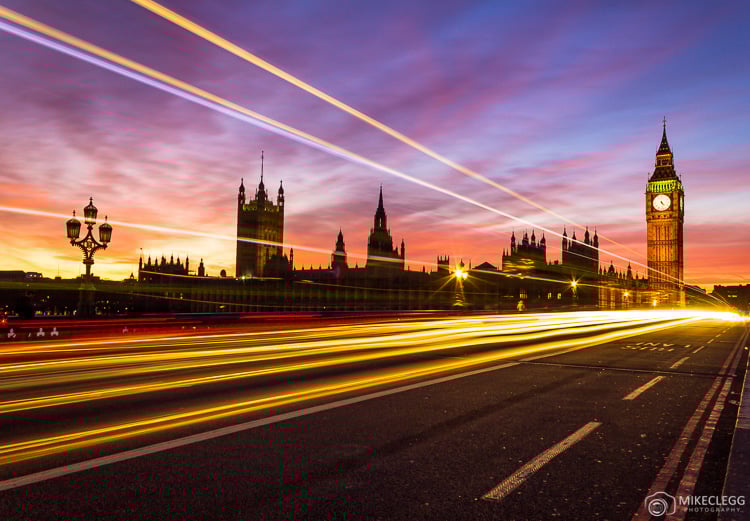
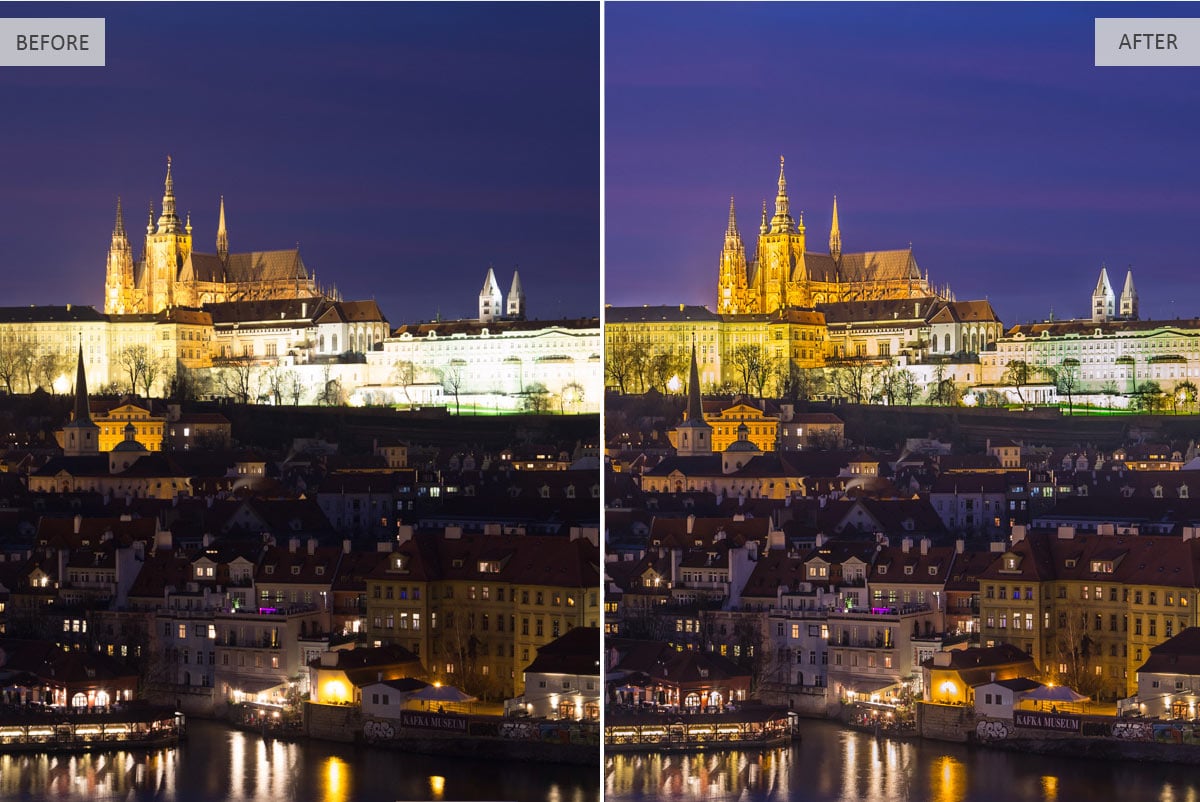
Bringing down the highlights can be used with nighttime pictures where you can make artificial light less intense such as the light on buildings and landmarks. Below is an example where you can see the image on the left has really blown out highlights on the buildings, whilst on the right they are reduced and therefore creates a much more pleasant picture with more detail.
Skies are another good example of when you might want to lower the highlights and more so if there are clouds or other details that you want to improve. By lowing the highlights you could improve the appearance of the clouds and create a more balanced image.

3. Increase the shadows
Another way to bring out more detail in your pictures is by increasing the shadows. This is especially helpful for images that have dark shadows such as when you take pictures during the morning, late afternoon, or during low light scenes. Similar to what we mentioned about highlights above, if you take images using the RAW format then you should be able to bring out more detail and also do this without losing any quality.
It’s important to note that increasing the shadows should be done with care and not overdone as it can introduce noise. It can sometimes be possible to then remove some of that noise using noise reduction options in your editing apps.
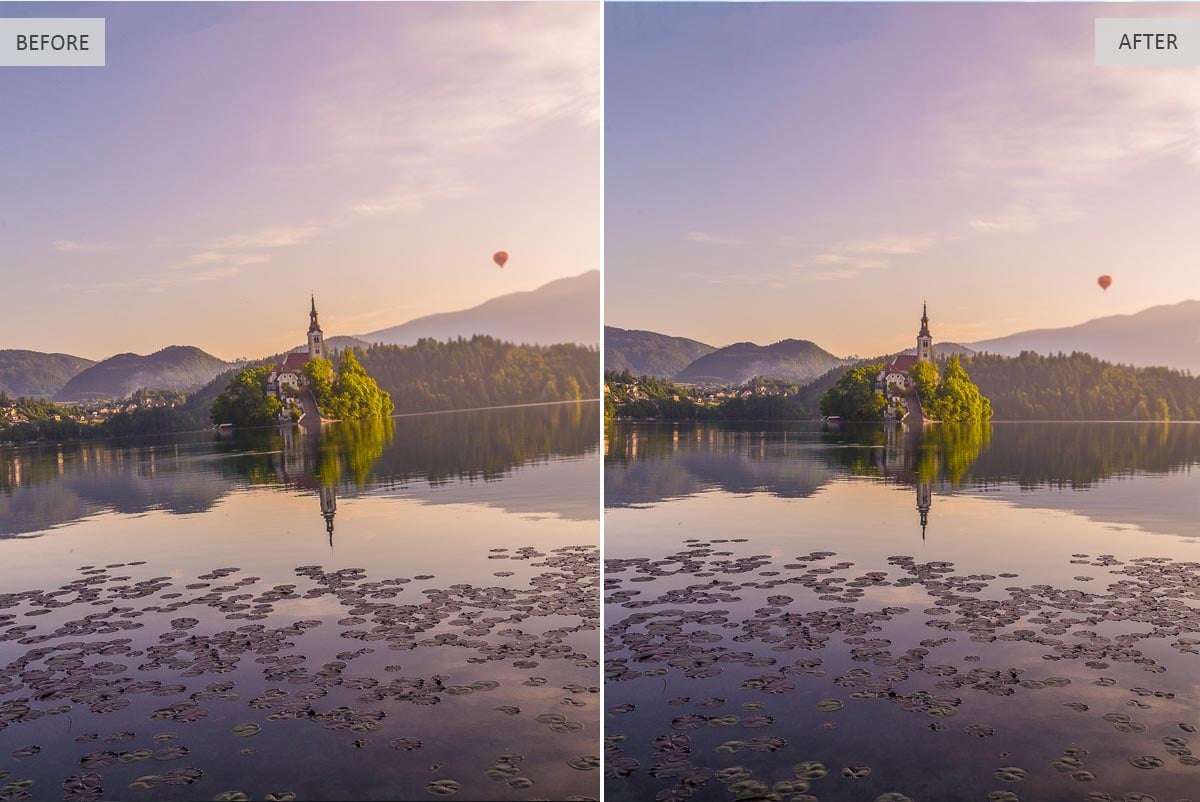
In our example below on the right side, you can see the picture overall is a lot brighter, particularly in the darker sections and this was due to just increasing the shadows.

4. Add some vibrancy and/or saturation
Adding saturation or vibrancy will make the colours in your picture pop a little. When doing this try not to add too much though as it can be easy to overdo it and make an image look like something from a cartoon and very unrealistic. It’s best to start with vibrancy and then add saturation if needed. Not all editing tools have both vibrancy and saturation options so keep that in mind as well. In Adobe Lightroom we might add around 20-30 vibrancy and sometimes a bit of saturation if it’s still needed.
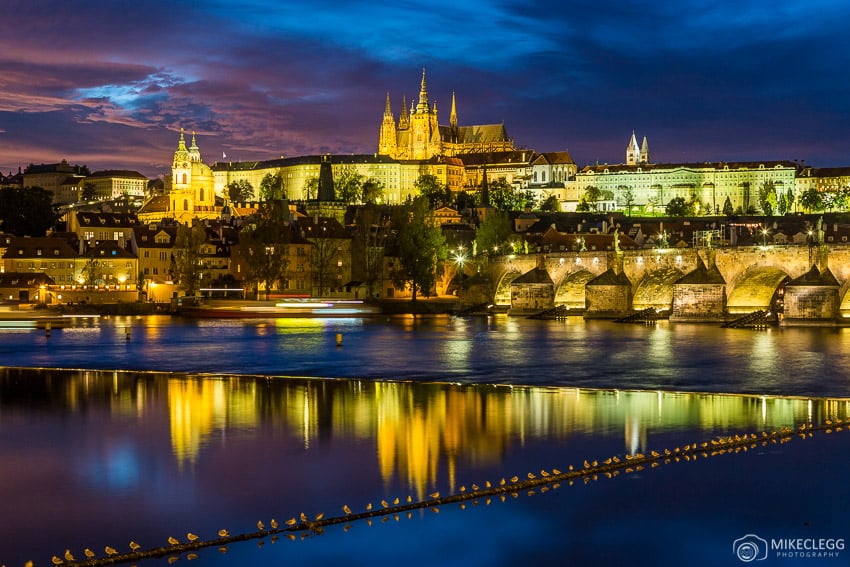
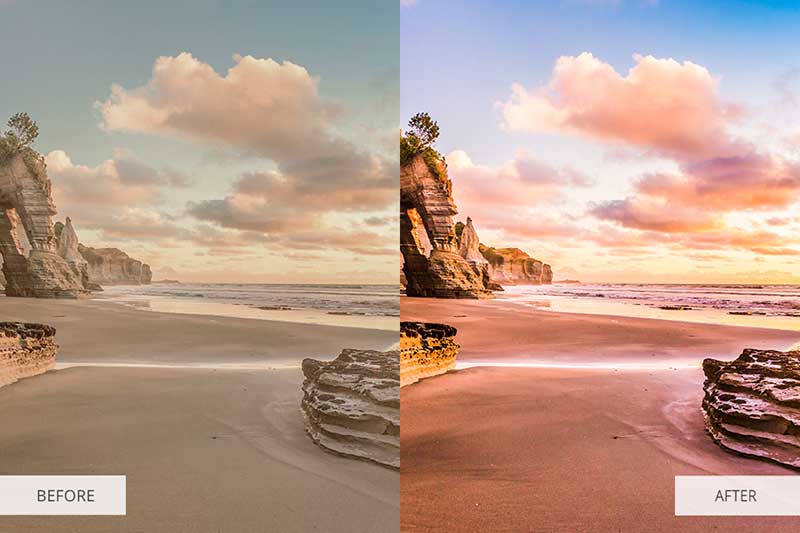
In the example below you can see the improvement in the colours on the buildings and also the sky is more blue. In the image below (on the right) we have also pulled down the highlights a little and also increased the shadows slightly to create a much more balanced and pleasing final picture.

5. Potentially add a filter or use a preset
Another step to easily making your travel photographs look better might be to add a filter. You can buy and download presets for tools such as Lightroom, or you can use filters available in apps such as Instagram and VSCO. You may also see influencers and photographers on Instagram promoting their own presets.
One thing you should be aware of though is that you may need to still make further tweaks to your images after using presets, so don’t expect them to completely edit the image for you. Read more about things to know about presents.
Should you want to use presets then it’s actually worth applying the preset first before making any further tweaks such as those mentioned above. This is because they often adjust the exposure, highlights, shadows and colours so you might otherwise be undoing what you’ve already done.
Finally, another thing that you can do is to make your own presets and filters and then apply them to your photos for a consistent look. You may find that when you’re editing you manage to create a “look” that you really like and then want it to be your style. Again creating your own presets is possible in software such as Lightroom and likely in other photo editing tools as well.
Summary
Using the tips above you should easily be able to make your travel photographs look a lot better and give them some pop. These are just the very basics of photo editing and are good tips for beginners.
Some more advanced techniques include creating compositions of several images. This can sometimes make something magical and for this, there are other photo editing tools available. A few popular options include Photoshop as well as Luminar and these would be good bets for those types of edits. Check out instagram.com/nois7 who must be one of the best editors we’ve ever seen. You could also use the HDR technique to merge bracketed shots together and create more detail.