Adobe Lightroom is one of the best photography tools out there. I use it to edit and organise almost all my travel photographs. One of the reasons this software is so amazing is because it’s incredibly easy to use, and allows you to make a bad photo look much better and in minimal time. In this post I will tell you a little about the Develop module in Lightroom and show you a few examples of what I often do when I start editing my travel photographs. You can also buy and download presets which can help with your photo editing in Lightroom and to speed things up.
Recommended image format
Although you can edit photographs that are both jpeg, tiff and other formats, I recommend editing your photographs from a raw file. Many DSLR cameras will allow you to capture raw files, but check the settings as the default may be jpeg. A raw file is basically an unprocessed picture, and because of this, the file will contain more information about the scene, which in turn helps to make adjustments without any, or less data/image loss. The end result is a higher quality image.
What editing options do you have in Lightroom?
Lightroom is extremely powerful and has lots of different modules including Library, Develop, Map and Book. For the purpose of this post I am only going to explain about the Develop module which is used for editing and enhancing your photos.
Here are a few of the options available in the Develop Module:
- Crop/Rotate – Use to straighten and crop the image.
- Temp – Change the colour temperature of the image.
- Brightness/Exposure – Increase or decrease the exposure or brightness of the image.
- Contrast – Adjust the difference between light and dark elements in an image.
- Highlights/Shadows/Whites/Blacks – Adjust these sliders to bring out more detail.
- Clarity – Adjust the contrast in the mid tones of a picture.
- Vibrance/Saturation – Change the colours as a whole.
- Tone adjustments – Fine tune the colours and contrast.
- Colour Adjustments – Make adjustments to specific colours in the image.
- Sharpness and Noise – Sharpen the image and reduce noise.
- Lens Corrections – Fix problems caused by the lens, such as distortion, Chronic Aberration etc.
- Effects – Add effects such as Grain and Vignetting.
- Spot removal – Remove objects such as dust spots etc on the image.
- Gradients and brushes – You can use the brush to adjust specific areas on the image.
- HDR Merge – Allows you to merge images with different exposures into a higher detail image.
- Panorama Merge – Merge images together to form a wider or taller image.
Using these options you will have a lot of control over the final appearance of the photograph. If you wanted to make really advanced edits, then you could edit further in Adobe Photoshop or a similar program.
Steps for editing travel photographs
When making edits to photographs in Lightroom, I often start by adjusting the sliders until I get the final look that I want.
- I will almost always start in the Basic Panel and make basic adjustments. Sometimes these massively enhance the image as much as you need.
- I would then adjust the Tone Curve and colours if I feel it’s necessary.
- Next, I would add a little bit of sharpening and noise reduction as appropriate. Noise reduction isn’t always needed, but as I’m shooting in raw I will almost always add a little bit of sharpening.
- After that I will then add Lens Corrections.
- I may crop or straighten the image, but not always.
- Finally, I will often use the spot removal tool to remove any dust spots or blemishes on the image.
Those are the steps I normally follow to make the most basic of adjustments. Some images take longer than others, but you could easily edit and enhance an image in around 5 minutes or less.
Editing travel photographs: Example one:
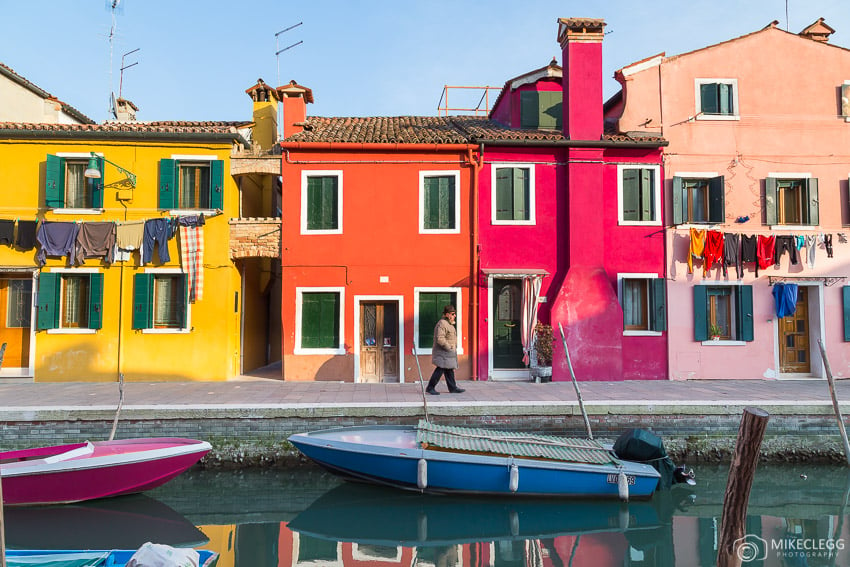
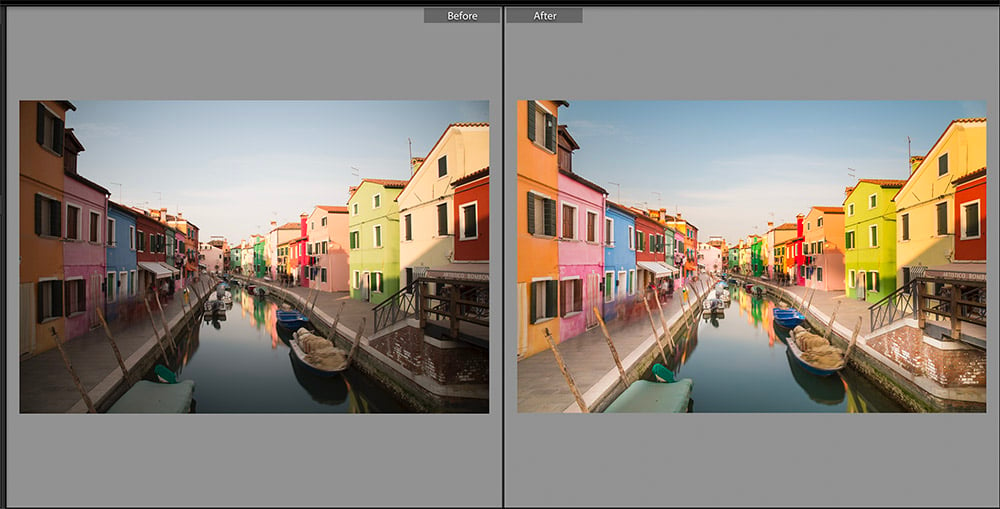
Below you can see an example of my Burano image and what the image looked like before, and what the image looked like after the edits.
As you can see in the before, the image is very dull, almost lifeless, whilst the final image is a lot more vibrant and nicer to look at with much more detail.
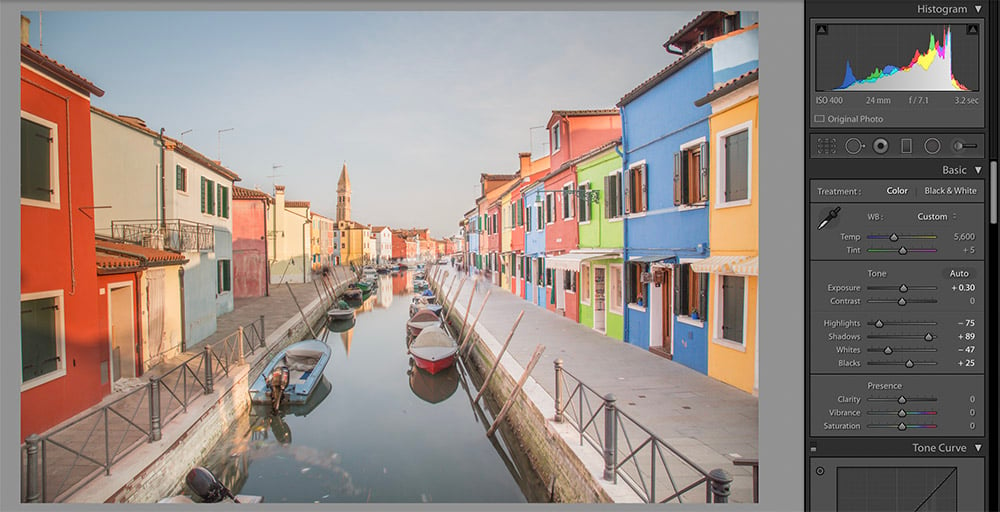
Adjust brightness, highlights, shadows, whites and blacks
The first thing I do is adjust some of the basic options so as to balance the image better. To do this I:
- Increase the Brightness slider a tiny bit to make the image brighter.
- Reduce the Highlights slider. This brings out more details in the sky and is especially effective if your sky is blown out.
- Increase the Shadows slider. By doing this the left-hand side of my image becomes vastly brighter, as well as any parts of the image that were quite dark.
- Adjust the Whites and Blacks Slider. Similar to the Highlights and Shadows this will change certain areas in the image, but the areas which are very bright, and the areas that are quite dark.
Saturation and vibrance
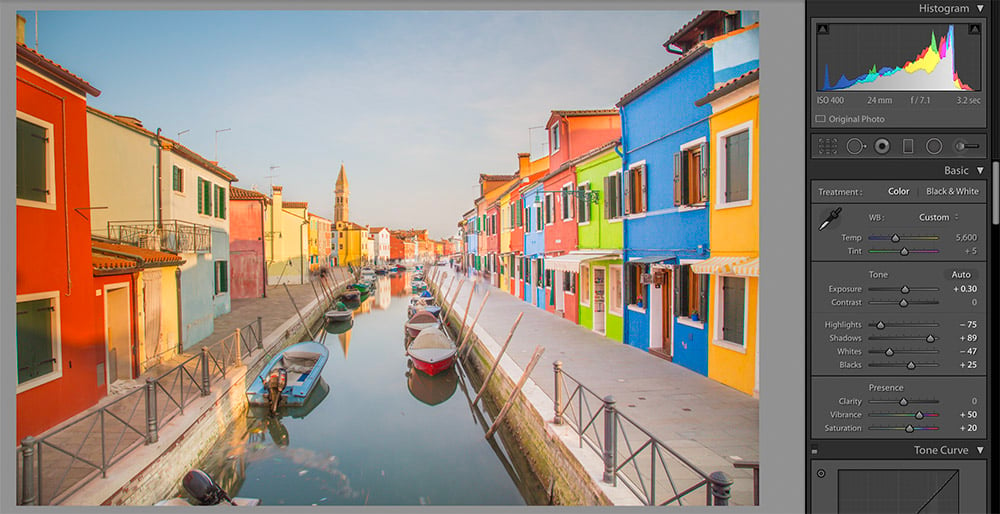
The next step will be to add some Vibrancy and Saturation to the image. As you can see from this image vs the image above, it really adds a pop to the image and instantly makes it look pretty dazzling.
Tone curve and colours panel
Next using the tone curve and colours panel you may want to make a few changes based on your preference. This allows you to fine-tune the look that you are after.
Details
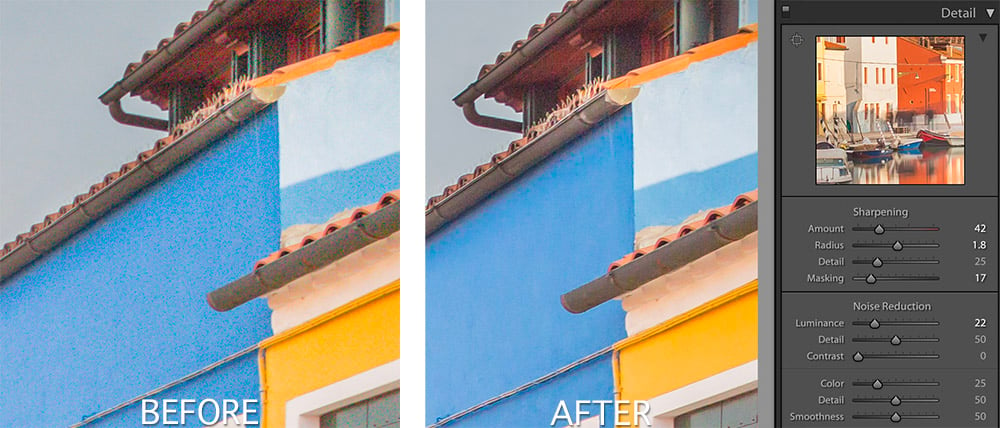
Now we come to the details. This part of the Develop Module in Lightroom lets you sharpen your image and also reduce any noise that you may have. Unfortunately, sometimes the noise can be introduced if you increase the Shadows and Blacks. Unless you shoot your picture in HDR (where you take multiple images at different exposures to capture as much detail as possible and then merge), then this is pretty much unavoidable.
By changing the Sharpen sliders and increasing the Noise Reduction sliders, you can see below that the image quality on the right-hand side looks a lot better.
Lens corrections and chronic aberration
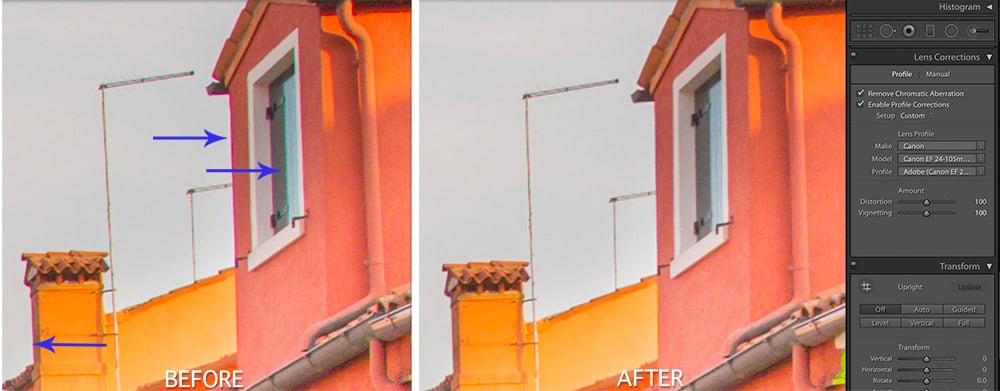
The final step in this example is to remove any Chronic Aberration and apply lens profile corrections. By applying profile corrections you should remove any distortion (bulges) that is caused by the lens, so it makes the image look more flat.
Chronic Aberration is the purple and green bits seen on the left image below. It is caused by the light going through the lens and not converging properly, resulting in fringes of colour normally on edges of parts of the image. Luckily using Lightroom you normally just click the “Remove Chronic Aberration” button and it’s gone. If this option doesn’t get it all removed, then you can go into the manual options and make a more precise adjustment.
Editing travel photographs: Example two:
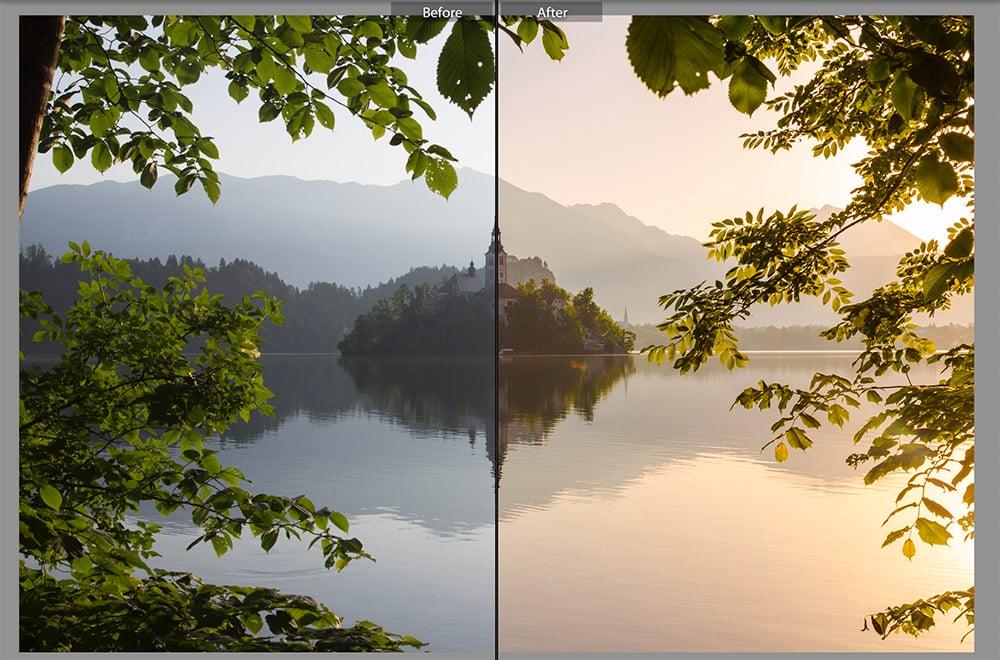
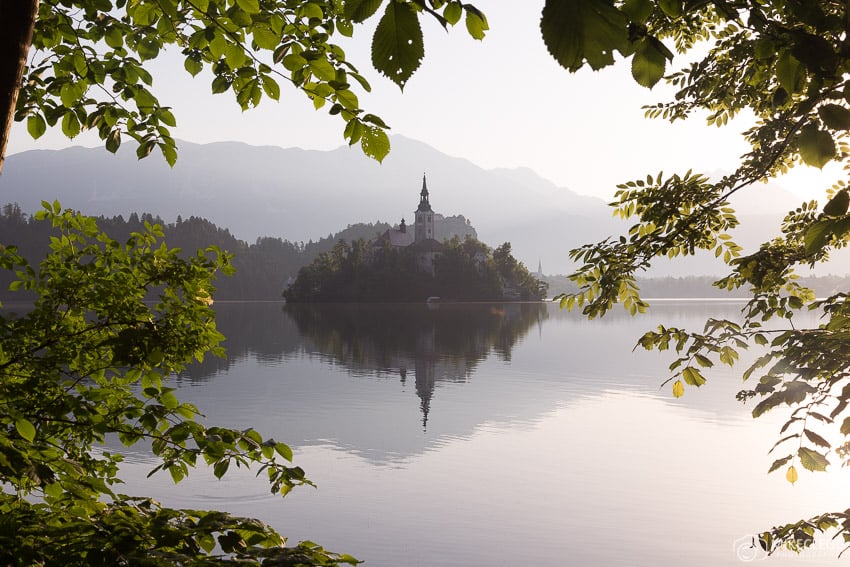
In my next editing example for Adobe Lightroom, I am going to show you the main adjustments I made to a landscape photograph I took at Bled Lake in Slovenia. Below you can see the starting image, taken in raw on my Canon EOS 6D. It’s a nice image, but it lacks any punch and looks a bit empty and dull.
White balance
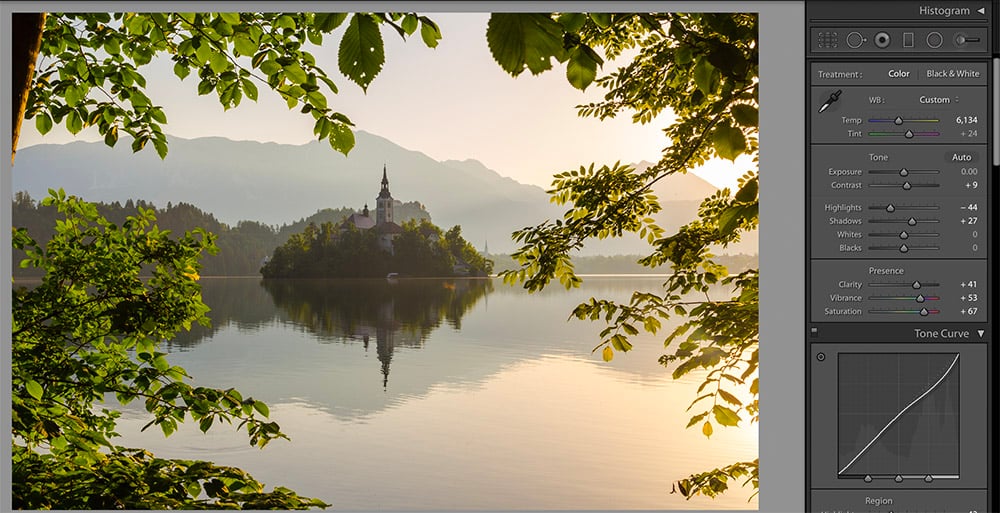
When taking pictures during sunset or sunrise, and you’re using “Auto” as your white balance setting on your camera, you may find that the colours won’t look as warm as you want. For that reason, the first adjustment I make is to increase the white balance from its auto setting of 5300 up to 6134. To get to this number I gradually increased the Temp slider until the colour looked how I wanted. The changes may look subtle at this point but combined with the next adjustments it makes a big difference.
Basic adjustments
My next adjustments make a huge transformation to the image. I adjust the Highlights, Shadows, Clarity, Vibrance and Saturation. The Highlight, Shadows and Clarity sliders bring out more details, whilst the Vibrance and Saturation give it nice colours and more punch.
Tone curve
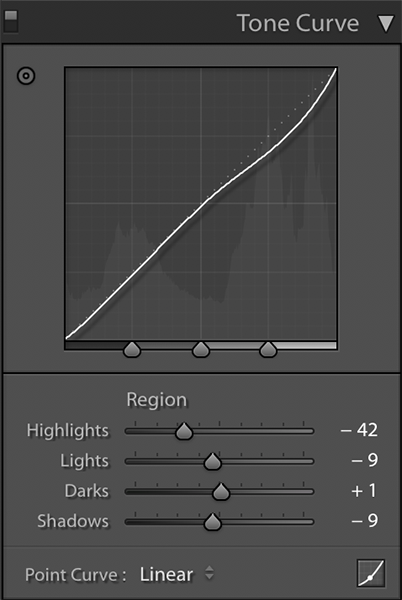
During my edit I then made some small adjustments to the Tone Curve slightly, to pull down the bright sections of the image.
Split toning
The next adjustment I made to this image was to add a small Split toning effect. This made the colours look even warmer and softer. To decide on which split toning settings to use, I normally pick a colour (Hue) and then gradually adjust the Saturation to get the desired effect. You would probably need to do this on both the Highlights and Shadows as I did below.
Final steps
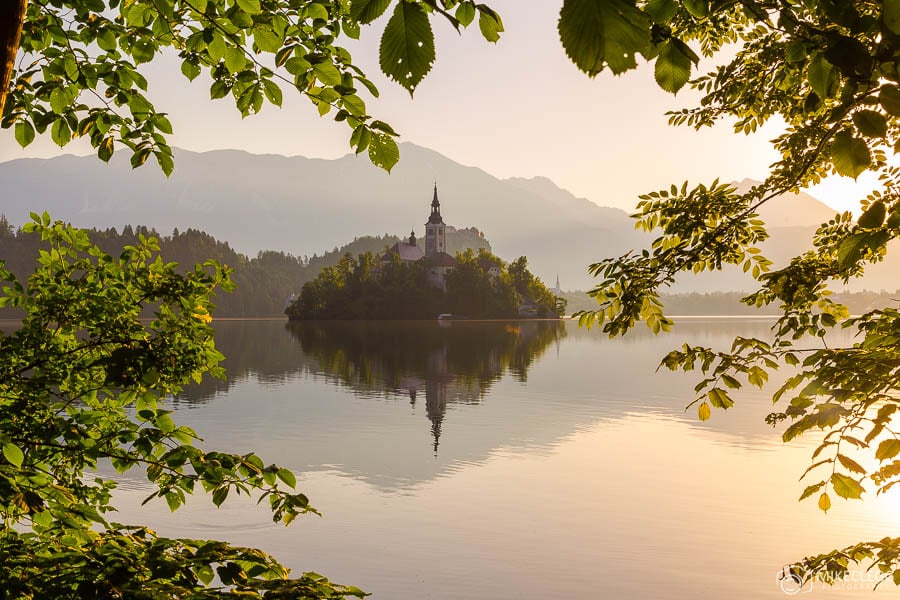
The Final steps were then to apply Lens Profile Corrections, remove Chronic Aberration, and check and remove any dust spots on the image. The end result was pretty much the image you see above.
Summary
Adobe Lightroom is a fantastic editing tool and packed with features making editing your travel photographs quick and easy. As well as editing your photographs you may want to learn more on how to capture awesome photographs. You’ll find heaps of tips techniques on my page Travel Photography.


