Christmas Markets are ideal for photography. They come with an amazing atmosphere, decorations and lights, and these make great picture opportunities. In cities the markets are often near landmarks, which is an extra bonus as capturing images with a market and a landmark can look fantastic.
The best time to take Christmas pictures is often at night when all the decorations look magical and enticing, but the settings you use at this time can have different effects on the end result. Want to learn more? Then keep reading. Here are tips and techniques for taking photographs of Christmas markets and decorations.
Fast Exposures
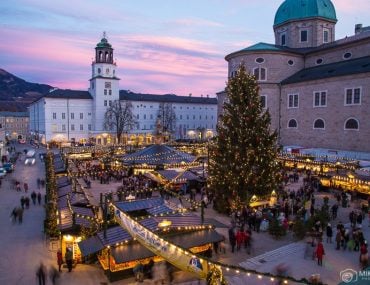
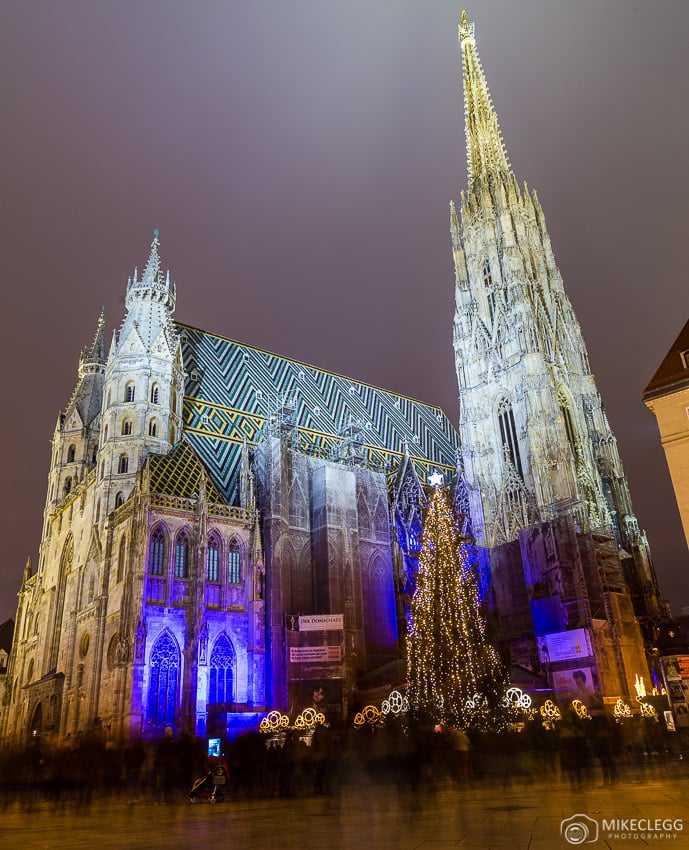
When it gets dark, often the best technique for night photography is to use a tripod, low ISO (ie 100) and long exposure. This helps prevent noise and allows for maximum image quality. But by taking a long exposure, people, traffic and other objects may be blurred or completely disappear. This can sometimes look quite ugly or make the Christmas Market look less appealing. The image below was taken with a 15-second exposure and this has created lots of really blurred shadows from the people, which I think looks messy.
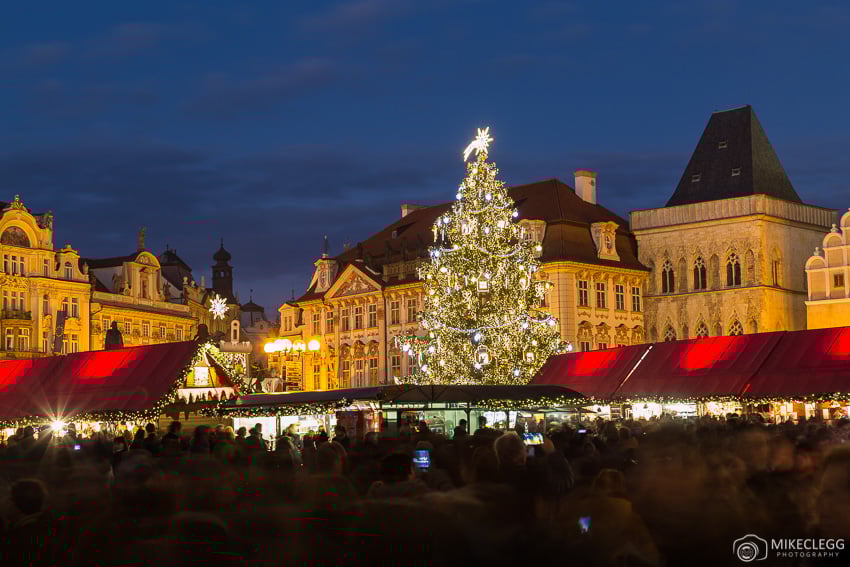
When taking pictures of Christmas markets they can often look better if you keep people in the image, so as to show the atmosphere.
To do this, depending on how much light is available, use a wide aperture such as F4, and raise your ISO as required to give the picture a good bright exposure. You may still get some noise in your image, but at least you will capture the people and the atmosphere. You then ideally want the shutter speed to be no more than a couple of seconds, or if possible try and shoot faster than 1 second.
If you are shooting handheld make sure your image stabiliser (IS or VR) is on, and that you shoot at a fast enough speed to get sharp images. If your images are looking blurry then increase the ISO and shutter speed accordingly. Another good technique is to lean against objects (such as a wall or tree), or rest your camera on walls and other objects so as to keep the camera as steady as possible.
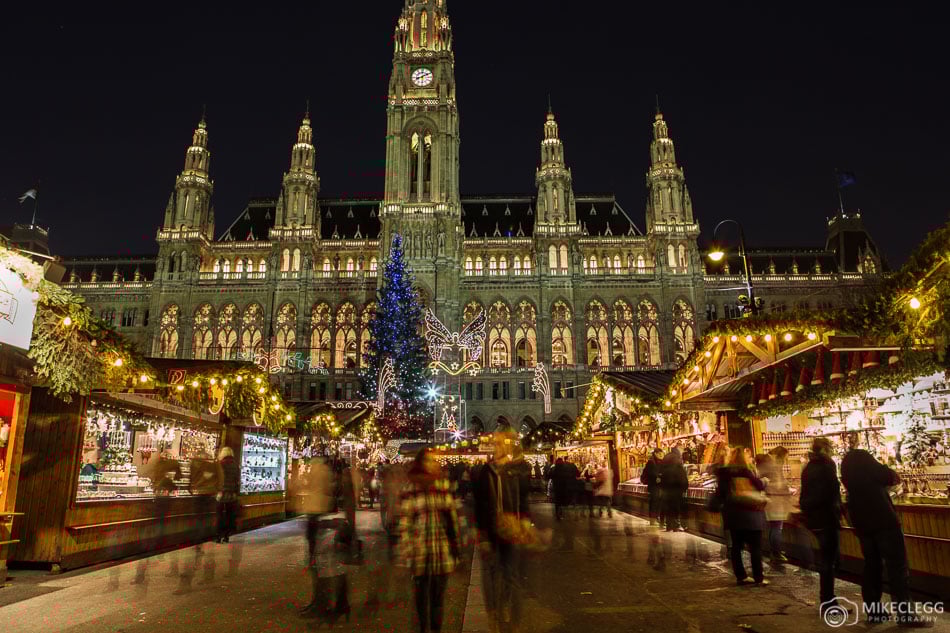
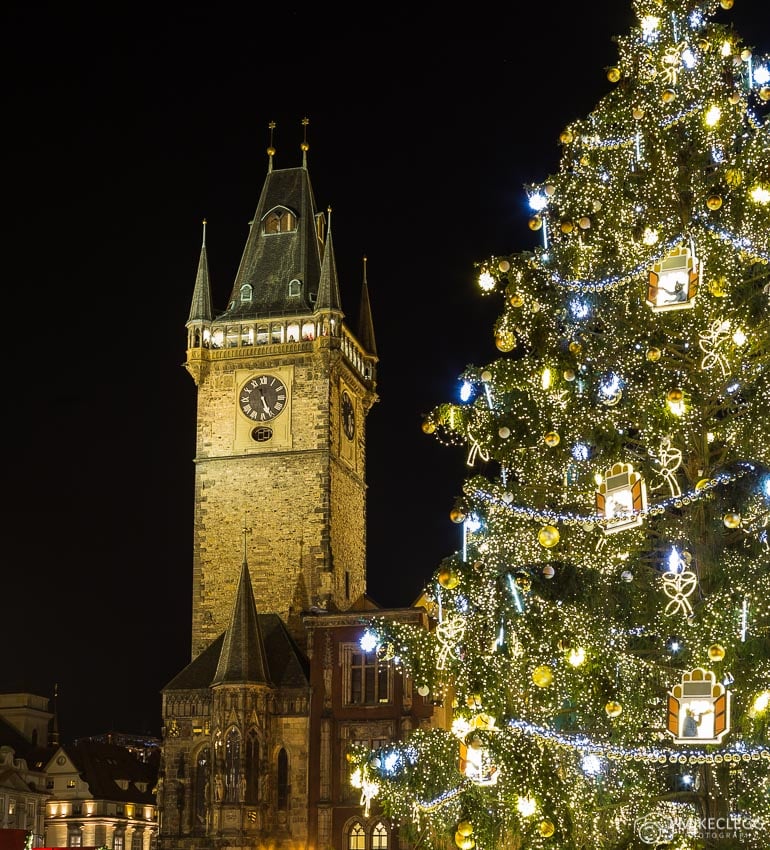
If you do shoot with a tripod this will allow longer exposures and prevent handshake. The image below is a 1-second exposure, so provides a little motion blur, but not enough to blur people out completely or created messy shadows. When using a tripod use a 2 or 10-second timer to help prevent any wobble from you pressing the shutter button.
Suggested settings for fast exposures in low light
- Camera mode: AV/A (Aperture priority) or manual (m)
- Shutter speed: Set by the camera (Aperture priority) or meter accordingly (m). Aim for 2 seconds or faster
- Aperture: As wide as possible such as F4
- ISO: As low as possible but fast enough to get sharp images. Shots that are taken slower than 1/30 may incur handshake (without a tripod). Increase the ISO to allow for faster shutter speeds, or if your images are blurry
- Image Stabiliser: Yes if not using a tripod (IS or VR)
- Focus: Auto
- Timer: 2 or 10 seconds if using a tripod
- Tripod: Optional
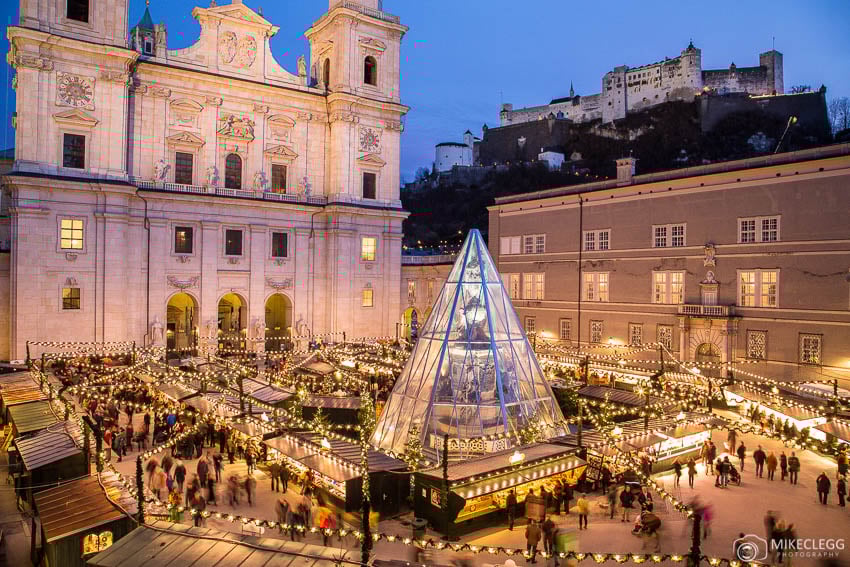
Long Exposures
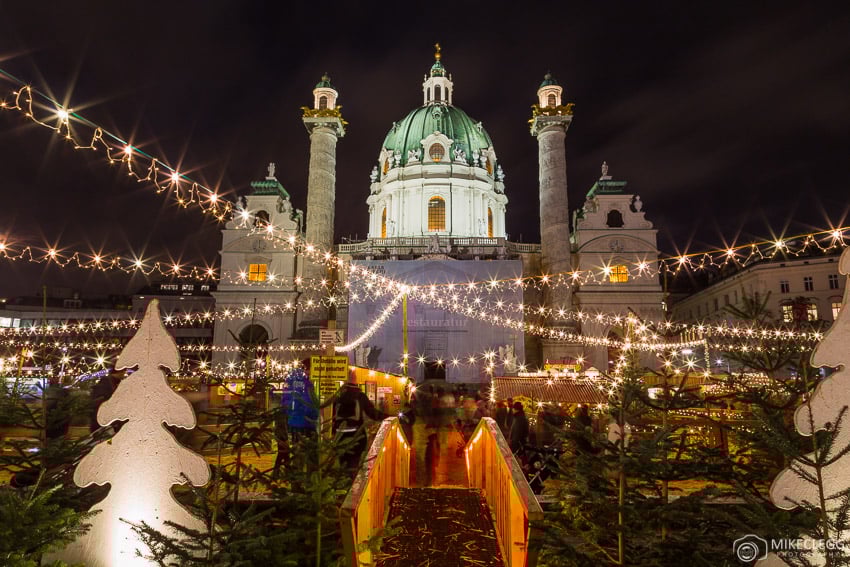
For some Christmas market images, such as details, distant shots, or where you need to take a longer exposure to get the shot you want, then it may be best to use a long exposure with the lowest ISO possible (such as 100).
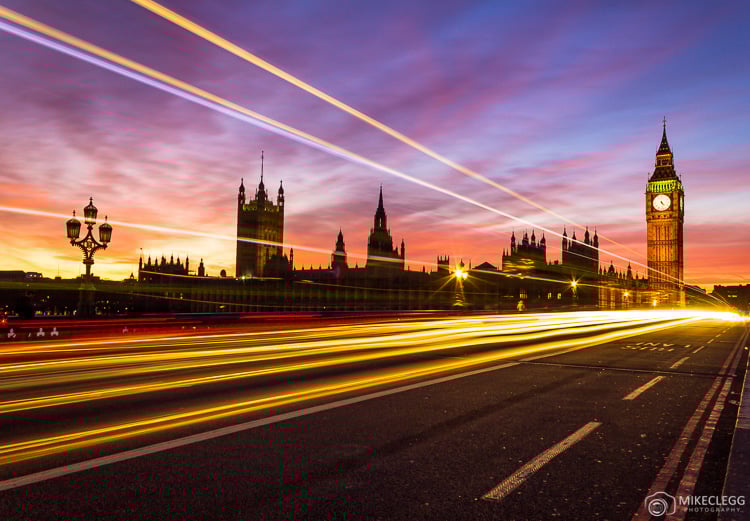
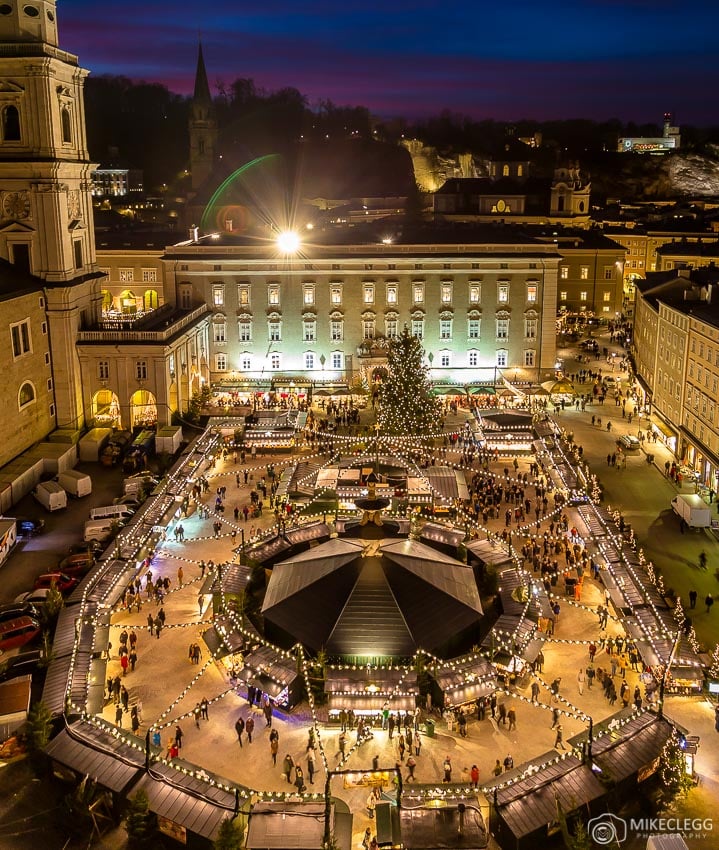
The first image below uses a 4-second exposure, and by doing so blurs out the foreground to a good level. This should make the viewers focus go to the lights, stalls and buildings in the background, which is the more interesting part of the image. A tripod was required for this image and if I didn’t use one there would have been handshake.
One thing to note is that when taking pictures of Christmas markets when they have lots of lights, depending on what aperture you use, such as F4 or F16, you will have different amounts sparkles from lights. A wide aperture such as F4, will have minimal or no sparkle, whilst a narrow aperture such as F16 will have a big sparkle. Sparkles can sometimes be distracting if they are too extreme or there is too many of them, so bear this in mind when you take your picture.
If you want to read more about taking long exposures, I recommend using the techniques in my cities at night tutorial to get well exposed, sharp images.
Suggested settings for long exposures in low light
- Camera mode: AV/A (Aperture priority) or manual (m)
- Shutter speed: Set by the camera (Aperture priority) or meter accordingly (m). Should be slower than 1 second
- Aperture: Adjust according to the depth of field you want, or for sparkles (mentioned above). A narrow aperture ie f8-f16 will often force longer exposures
- ISO: 100 – Increase accordingly if you want people and moving objects to be less blurred
- Image Stabiliser: No (IS or VR). Turn this off as the camera will try and find movement that’s not there when using a tripod
- Focus: Manual or auto. I always use manual when using a tripod
- Timer: 2 or 10 second
- Tripod: Yes
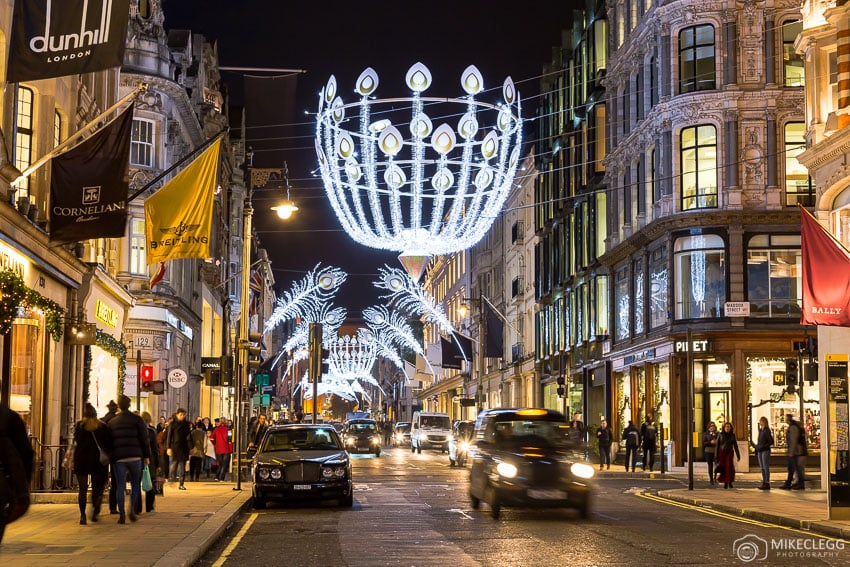
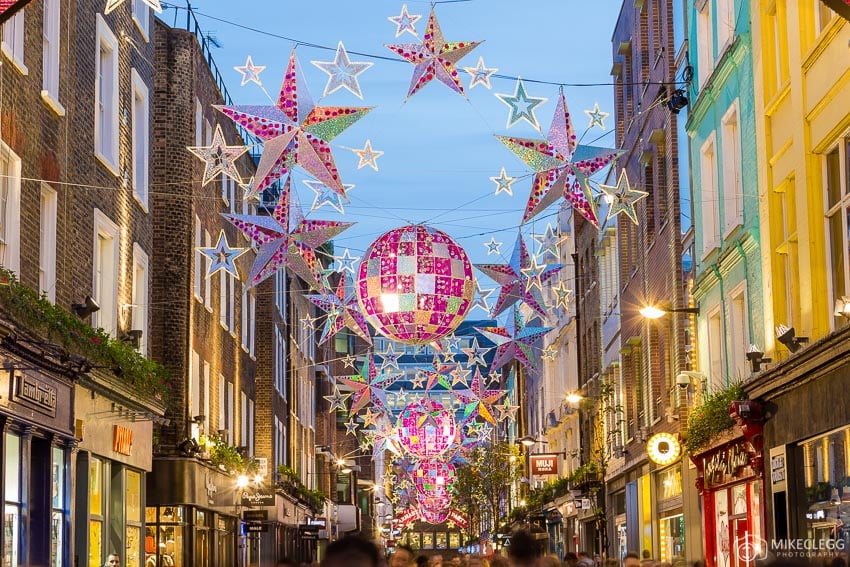
Christmas Lights and Streets
The techniques above can also be used for taking pictures of decorations in a street. So if you want to freeze people and traffic, then use a faster exposure, and if you want people and traffic to be blurred or create light trails, then use longer exposures.

Editing Christmas Photographs
When editing Christmas photographs here are some of our recommendations:
- Lower your highlights as often these can be quite bright, especially with long exposures. As a result you’ll bring out more detail in the picture.
- Increase shadows slightly to bring out more detail and create a more balanced image. Note that you need to be wary of introducing noise by doing this, so consider adding noise reduction if necessary.
- Adjust your white balance as necessary to get your desired look. Often photographs taken at night can have a warm look when taking the picture in auto mode. A warm look can often look good, but you just need to make sure it’s not too much. Similarly, if your photo looks too cold/blue then increase the white balance.
- Add a little saturation or vibrancy to make any colours pop.
- Increase your brightness slightly if the image in general appears a little dark.
More posts on Instagram and Photography Spots